
Welcome to Kate's Blog!
Check back frequently for the latest updates and designs.
You can view other older posts from Kate on the Tot Toppers Blog.
I-cord Cable Cast-on
This is a demonstration (with audio) of an i-cord cast-on featuring cables, used in my blanket & hat patterns, the Johnnie Layette Set. Written step-by-step instructions are included below the video.
This cast-on was really neat to play around with. I started with a basic i-cord and then decided I wanted to make it even more special so I incorporated cables.
Begin with a small provisional Cast-On that is the same width as your i-cord will be. The cord grows in rows, so we aren't talking about the width of your entire project, but just the width of the cording itself. My new blanket features a 5-stitch cord.
Begin by knitting across the cast-on stitches with your working needles. You will always be working the RS (right side) of your project, so at the end of each row, be sure to slide your stitches across your circular needle or DPN so that you are ready to work the RS again. You will not turn.
Here's where things get a little more unexpected and different than a standard i-cord.
Next Row (RS): *P1, insert your RH (right hand) needle into the right leg of the stitch UNDERNEATH the working row from back to front, and place this stitch on your LH (left hand) needle.**
Finish the row by knitting across your remaining stitches, this should be the same number of stitches as you cast on because you've purled the first st and created a new stitch.
Slide the stitches you just knit back to your LH needle, leaving the purled stitch on your RH needle. This is how your cast-on grows! You'll only be sliding the originally cast on number of stitches back to the LH needle and leaving the first stitch worked of each new row on the RH needle, not to be worked again until the first full row of your project.
Next Row: Work exactly the same way as the previous row, beginning with the P1 and ending with slipping sts back to the LH needle.
Cabled Row: Work from * to **, purling a stitch and creating a new one. Knit only the first stitch. Instead of knitting across the remaining stitches as before, perform your cable!
Final Row of the 4-row repeat: Work just like the first two, no cable.
Give it a try! It does take some time but it results in a beautiful finished edging.
Enjoyed this tutorial? Consider a donation to help me continue to create tutorials for knitters! Thank you so much!
one-row buttonhole technique
This buttonhole works for pretty much every project I can imagine. It is worked on 1 row as the title implies and results in a tidy, neat, symmetrical and stretchy hole. The buttonhole itself is worked over the number of stitches desired in the buttonhole PLUS ONE. So, a 3-stitch buttonhole is actually worked over 4 stitches in order to close up both sides. Make sure to account for the extra stitch as you're planning your buttonhole placement!
Enjoyed this tutorial? Consider a donation to help me continue to create tutorials for knitters! Thank you SO much.
Learn to Knit-for Kids!
Enjoyed this tutorial? Consider a donation to help me continue to create tutorials for knitters! Thank you SO much.
Part 1 is an intro to our upcoming videos… meet the kids and hear what we are up to with this series.
Disclaimer: I don’t have a studio or professional equipment, my tripod isn’t tall enough to be in the exact spot I might have liked, but we did our best and the kids are super excited to share their progress.
Part 2 : step by step through the Backwards loop cast-on… Jesse starts by teaching you to slip knot, I show you how to add each stitch. Bloopers at the end!
part 3: step by step through the knit stitch. This video picks up right where Part 2 left off, with stitches cast on and ready to be worked. The kids help narrate while I show you lots of detailed close ups with headings and some slides with the steps needed to get knitting. After watching this video, you will be able to knit back and forth over however many stitches are on your needle and practice, practice, practice. Bloopers & kid videos are at the end of this one.
Part 4: practice

Part 5: Blocking & gauge! This video teaches new knitters about blocking and more importantly, GAUGE! Charlie shares his journey from finished swatch to measuring. Included are slides that detail the blocking & gauge measuring process. After this video, you’re ready to start a project.
After watching my new knitters at home, I decided to reorganize the series just a smidge in order to give this very important gauge lesson and get them started on their first projects, moving the Purl video down the line a bit. Don’t worry, we will definitely be teaching the Purl after everyone has a chance to master their knit stitch! Keep practicing! Next week we will talk about how to read a pattern and I will provide a free one with multiple gauge options so that you can use the swatch you have been working on as your gauge.
Click here or on the button above to download First Hat! As easy at can be, this hat is worked in the round from the bottom up with a rolled brim and options for adding stripes. To knit this hat, the only techniques you already need to be familiar with are casting on and the basic knit stitch. Options are provided for multiple sizes at several different gauges, that way you can choose one according to the worsted weight yarn and needles you've got on hand. This pattern also helps teach new knitters how to read patterns, with notes included alongside instruction.
Part 6: of the video series walks you through pattern reading. knitting patterns might have some language that is new to you, so let us help you understand how to interpret them. Below, Part 7 demonstrates the {very few} techniques that are new to this point. First Hat, episodes 6 & 7 go together!
part 7: Learn the new techniques needed for First Hat! this episode teaches joining to work in the round, adding a new color, k2tog, weaving yarn through live sts & weaving in loose ends. don’t forget to download the free hat pattern before you begin.

photo contest
I’m ready to get inspired for my fall knitting and one of my favorite ways to do this is to see pictures of beautiful projects! I thought it would be fun to have a little “contest” so you can show off your work, hear how much everyone else loves it and maybe win a prize, too.
How it works:
Post your picture on Facebook or Instagram of any Kate Oates or Tot Toppers design with the hashtag #kopicme. Make sure your photo is public so that it is searchable when I look up the tag! You can also e-mail your photos to help@kateoatesdesign.com to enter.
Any photo is ok! This could be a new photo of a project finished years ago, or a photo you have posted before. A WIP is also totally fine. Just inspire us all with gorgeous imagery or cute kids.
Deadline to enter is Thursday, August 1. That gives you a little time to take new photos if you wish!
I will repost the top pictures and the three that get the most love will all be winners! Entering the contest gives me permission to repost your photo. If you would like to remain anonymous, I’m more than happy to not tag you in your photo, just let me know by e-mailing help@kateoatesdesign.com!
Each winner will receive the same Prize Package including ALL of the following:
A kit from my Etsy shop (includes yarn and pattern)
A signed copy of my book, Grown
Your choice of any 3 single patterns
I cannot wait to see your pictures! I have seen so many beautiful ones through the years, even if I only get to see those again, I’ll be a very happy lady.

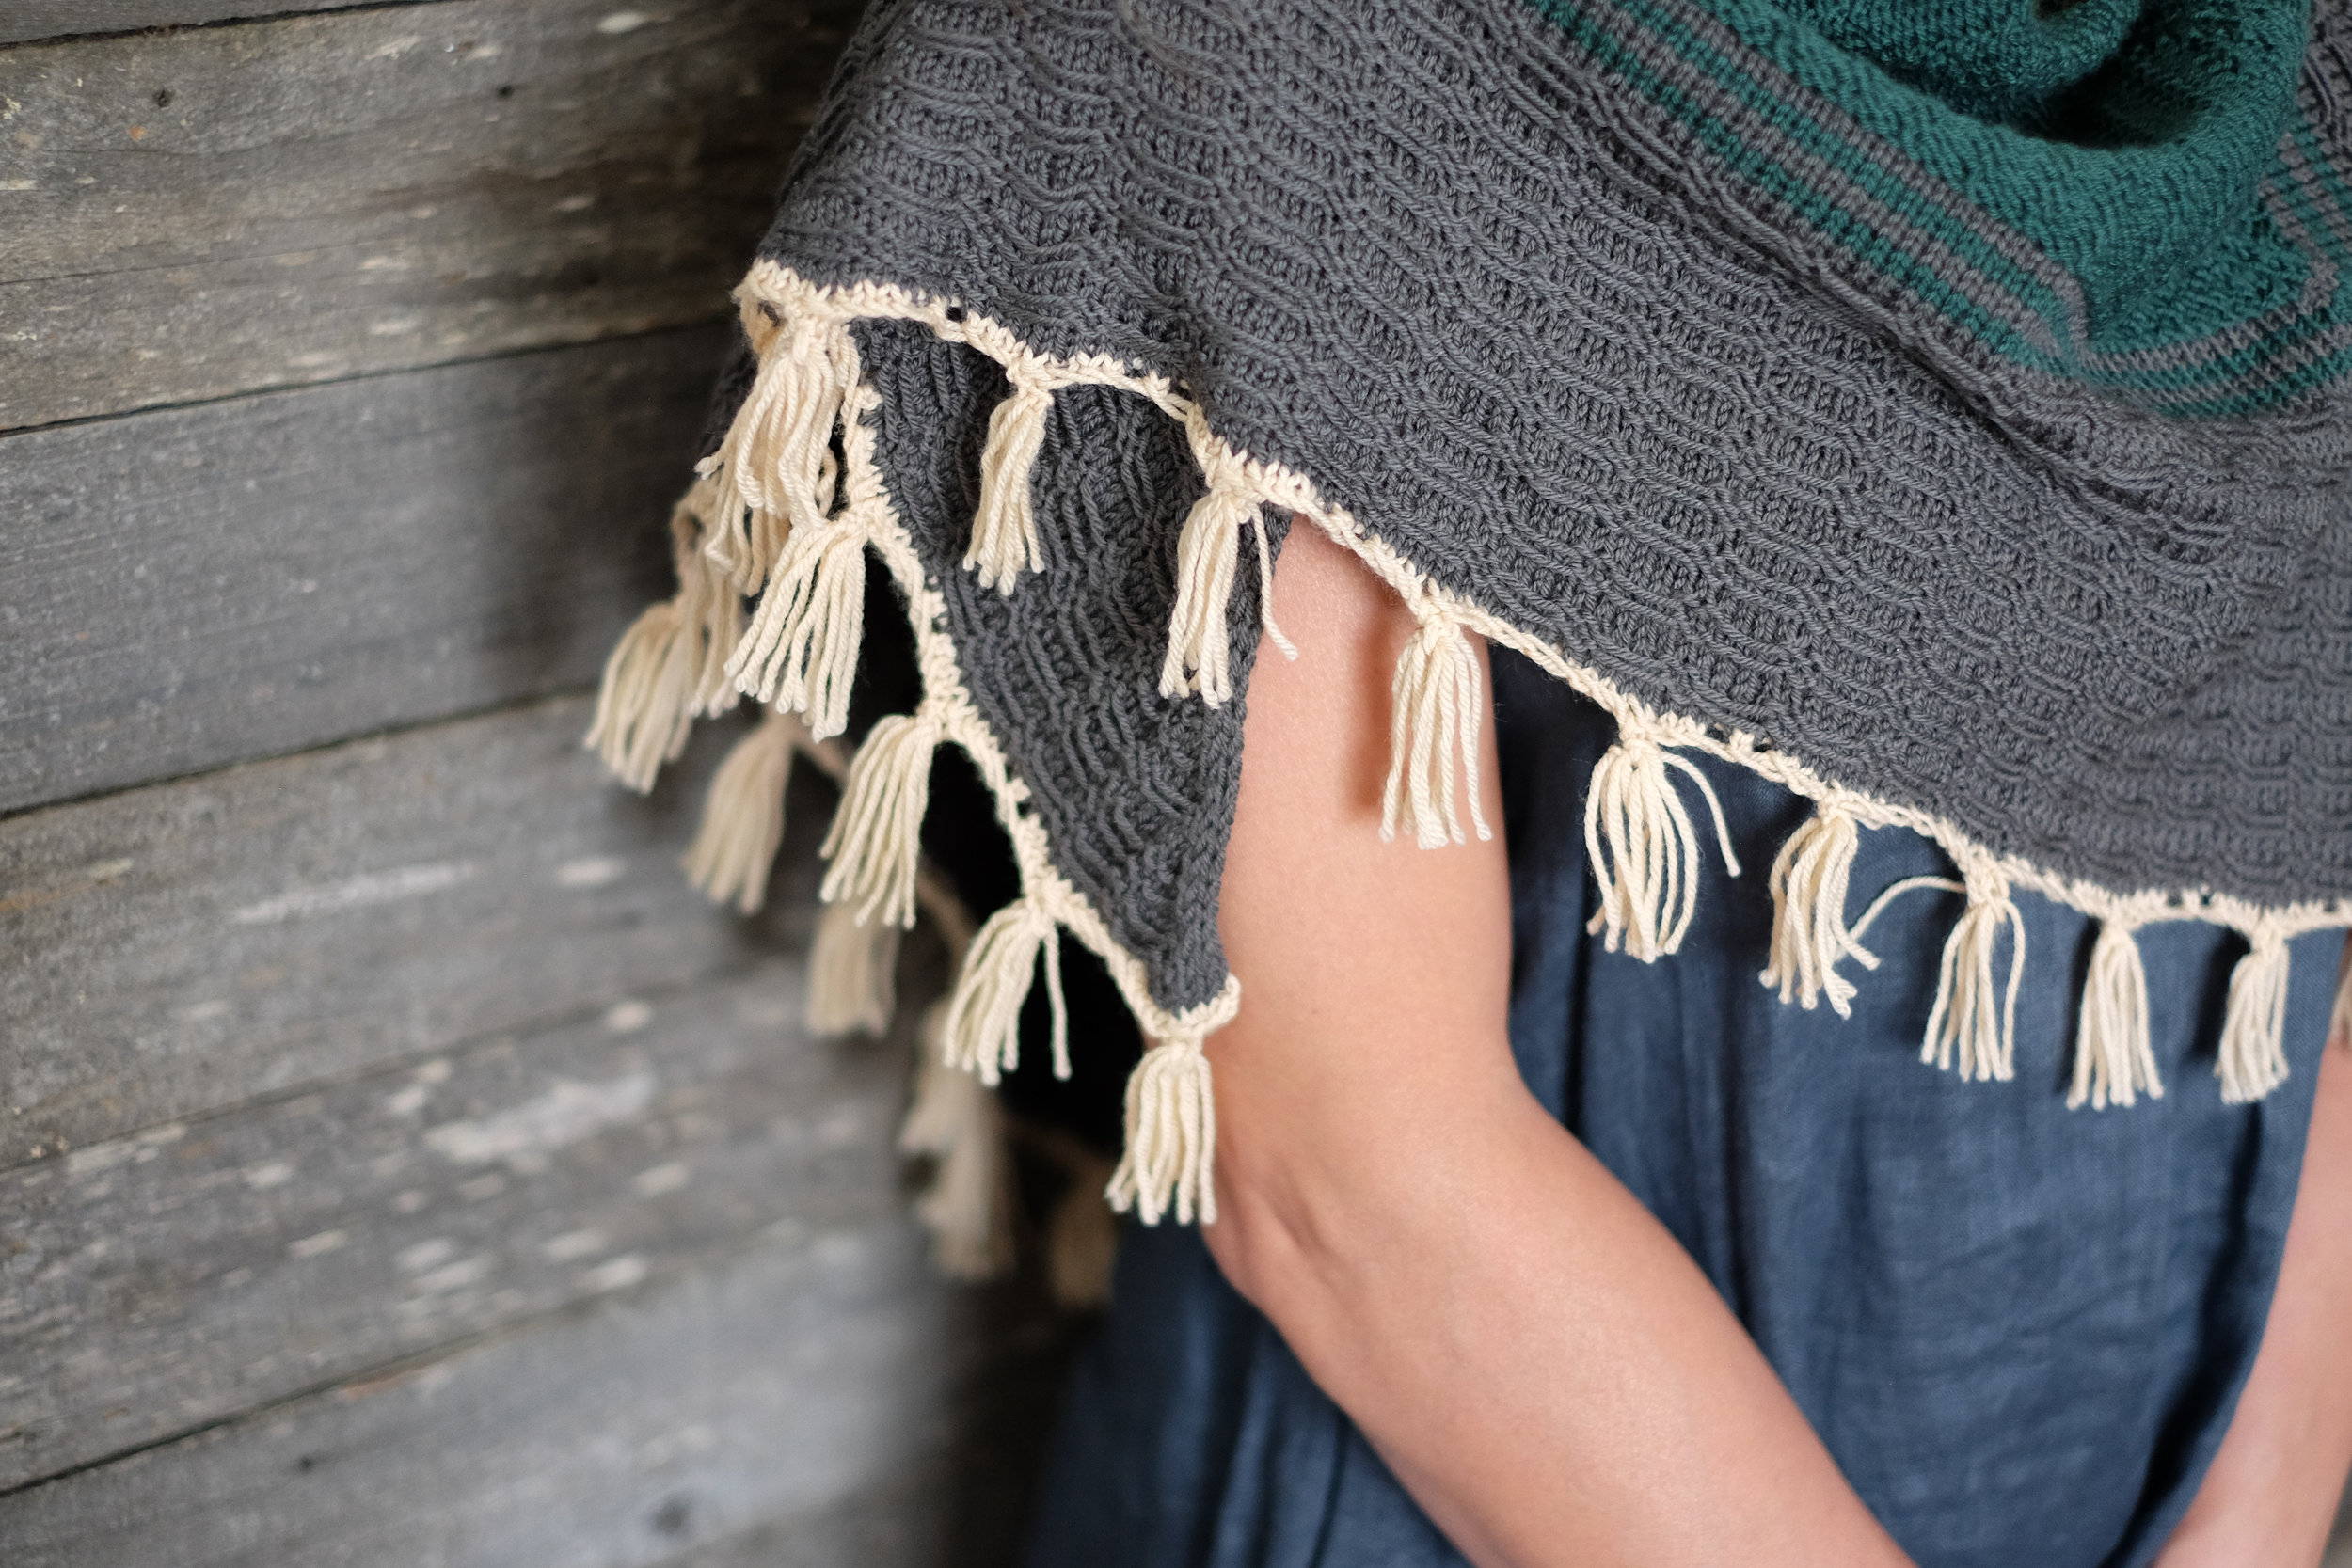

Knit-on Tassels
This 10 minute video walks you through each step of knitting on your tassels, featuring in my design, Lamellae Shawl. As a lover of minimal finishing, learning how to do this technique was transformative for me and meant that once I bound off my shawl, I was DONE instead of having to make a slew of tassels. You can utilize it in any bottom-up design. Tassels are worked on wrong side rows. Enjoy!
Enjoyed this tutorial? Consider a donation to help me continue to create tutorials for knitters! Thank you SO much!

Lee Wrapalong: the KAL to kick off your 2019
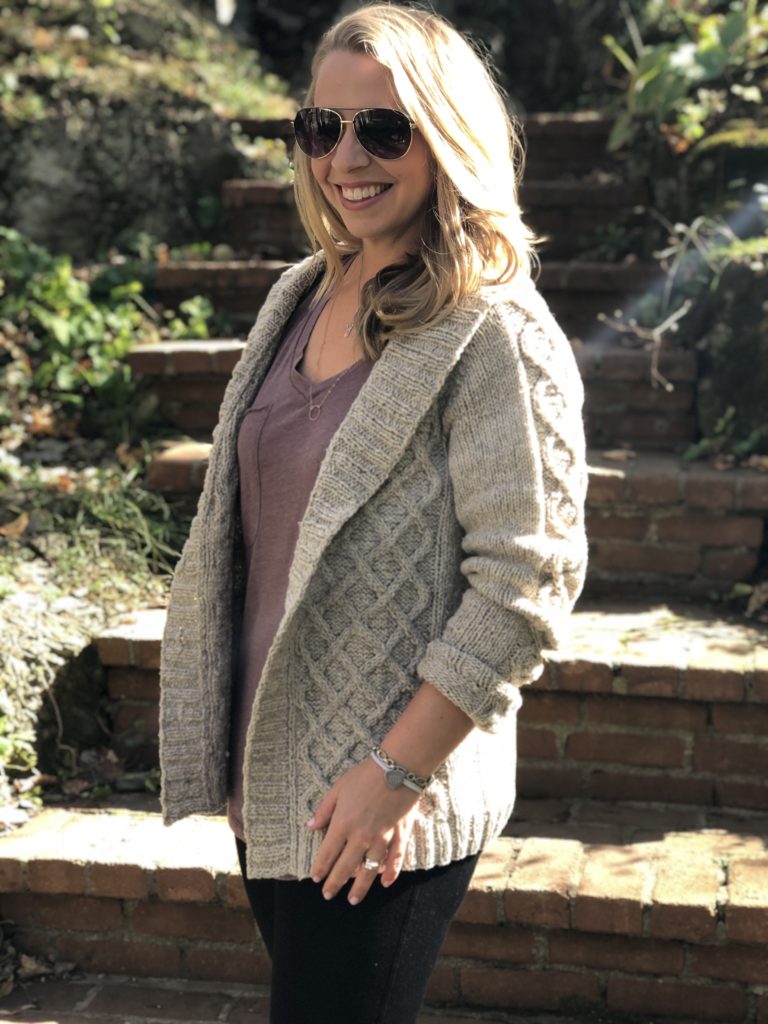
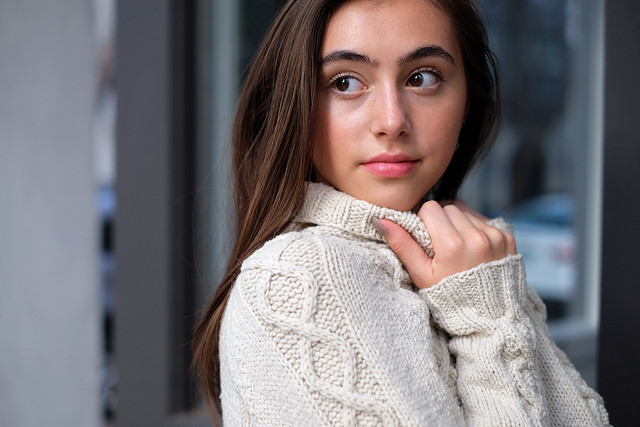
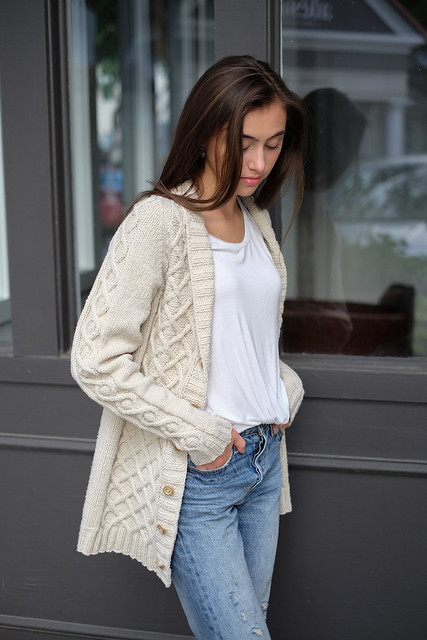
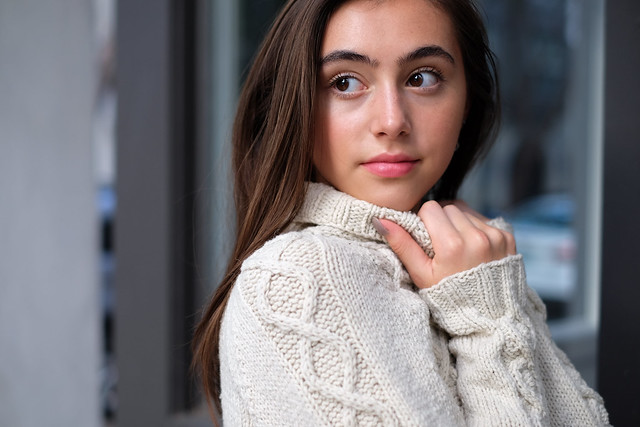
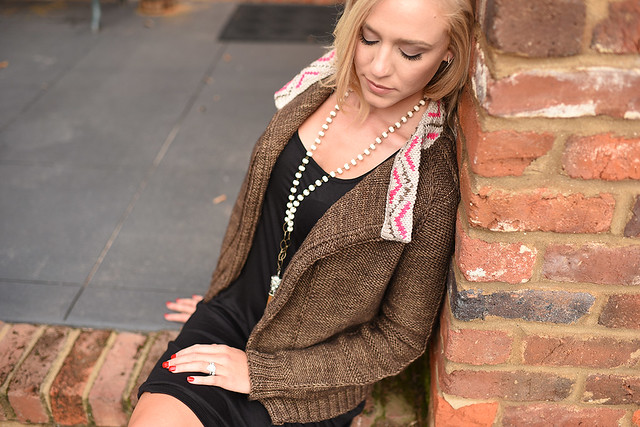
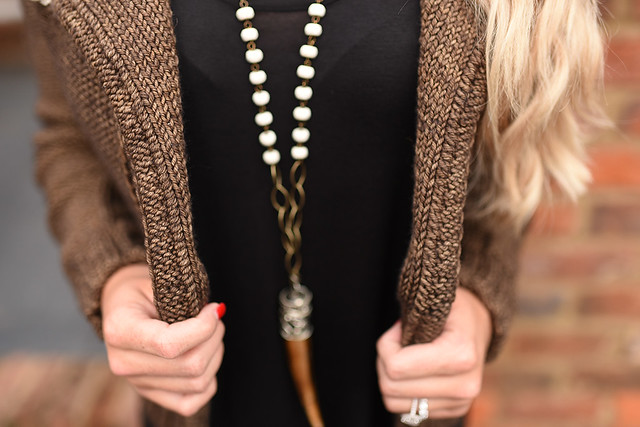
You made it through the holidays! January is here and the New Year is underway. You gift knitted your little fingers off and now it is time to knit something to reward yourself for all that hard work. I am so pleased to present a pre-order for the Lee Wrap which is a design that has been in progress for almost a year now. My favorite designs tend to involve a lot of trial and error and ripping out and re-doing and this one is no exception but my oh my, this cardigan is like wearing a big hug and I just want to live in it.

I’ve decided to do this release a little differently than usual because I am just so excited about this project. I’ve teamed up with YOTH Yarns and Fiber & Hue to set up a KAL deal with a variety of yarn options that work beautifully with this design. I wanted to give everyone time to place their yarn orders and maybe get a swatch or two done before we all CO together on the official KAL start date, which is next Tuesday, January 22. This will also give you a little bit of time to clear your needles, if you want to!

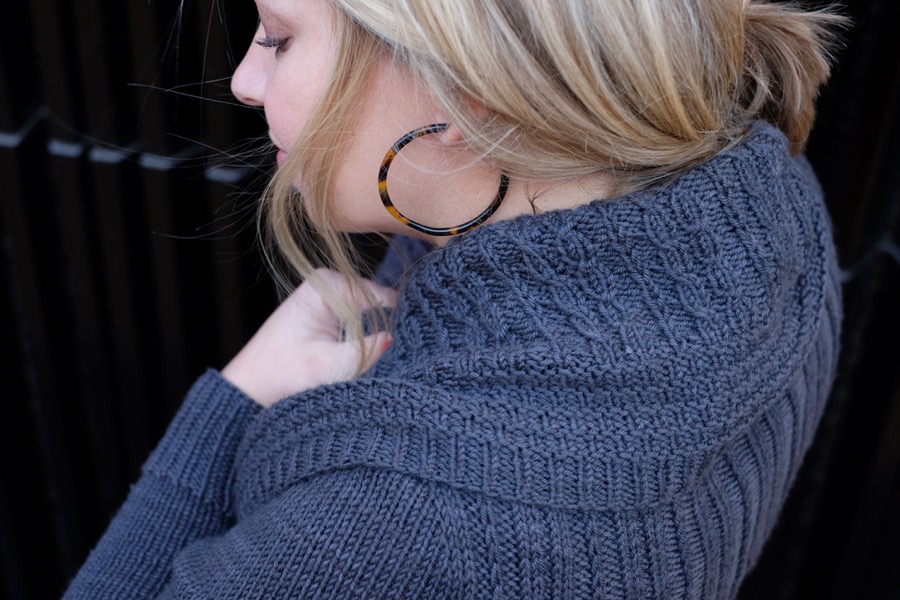
The wrap is constructed as a giant rectangle with set-in sleeves placed just-so. The sizing for the design is based primarily on upper arm with a very stretchy ribbed crossback, so you’ll be working your gauge swatch in stockinette as that’s how the sleeves are worked. The other textures featured in the design are totally reversible and you may recognize them from the Lee Blanket. The Twisty Rib is my favorite—it is a reversible cabled stitch worked without a cable needle. Jasmine (featured in the images above) is wearing her sweater oversized in YOTH Yarns Neighbor in Bronze (dyed by Fiber & Hue); I’m wearing mine with more fitted sleeves in YOTH Yarns Big Sister in Cracked Pepper.

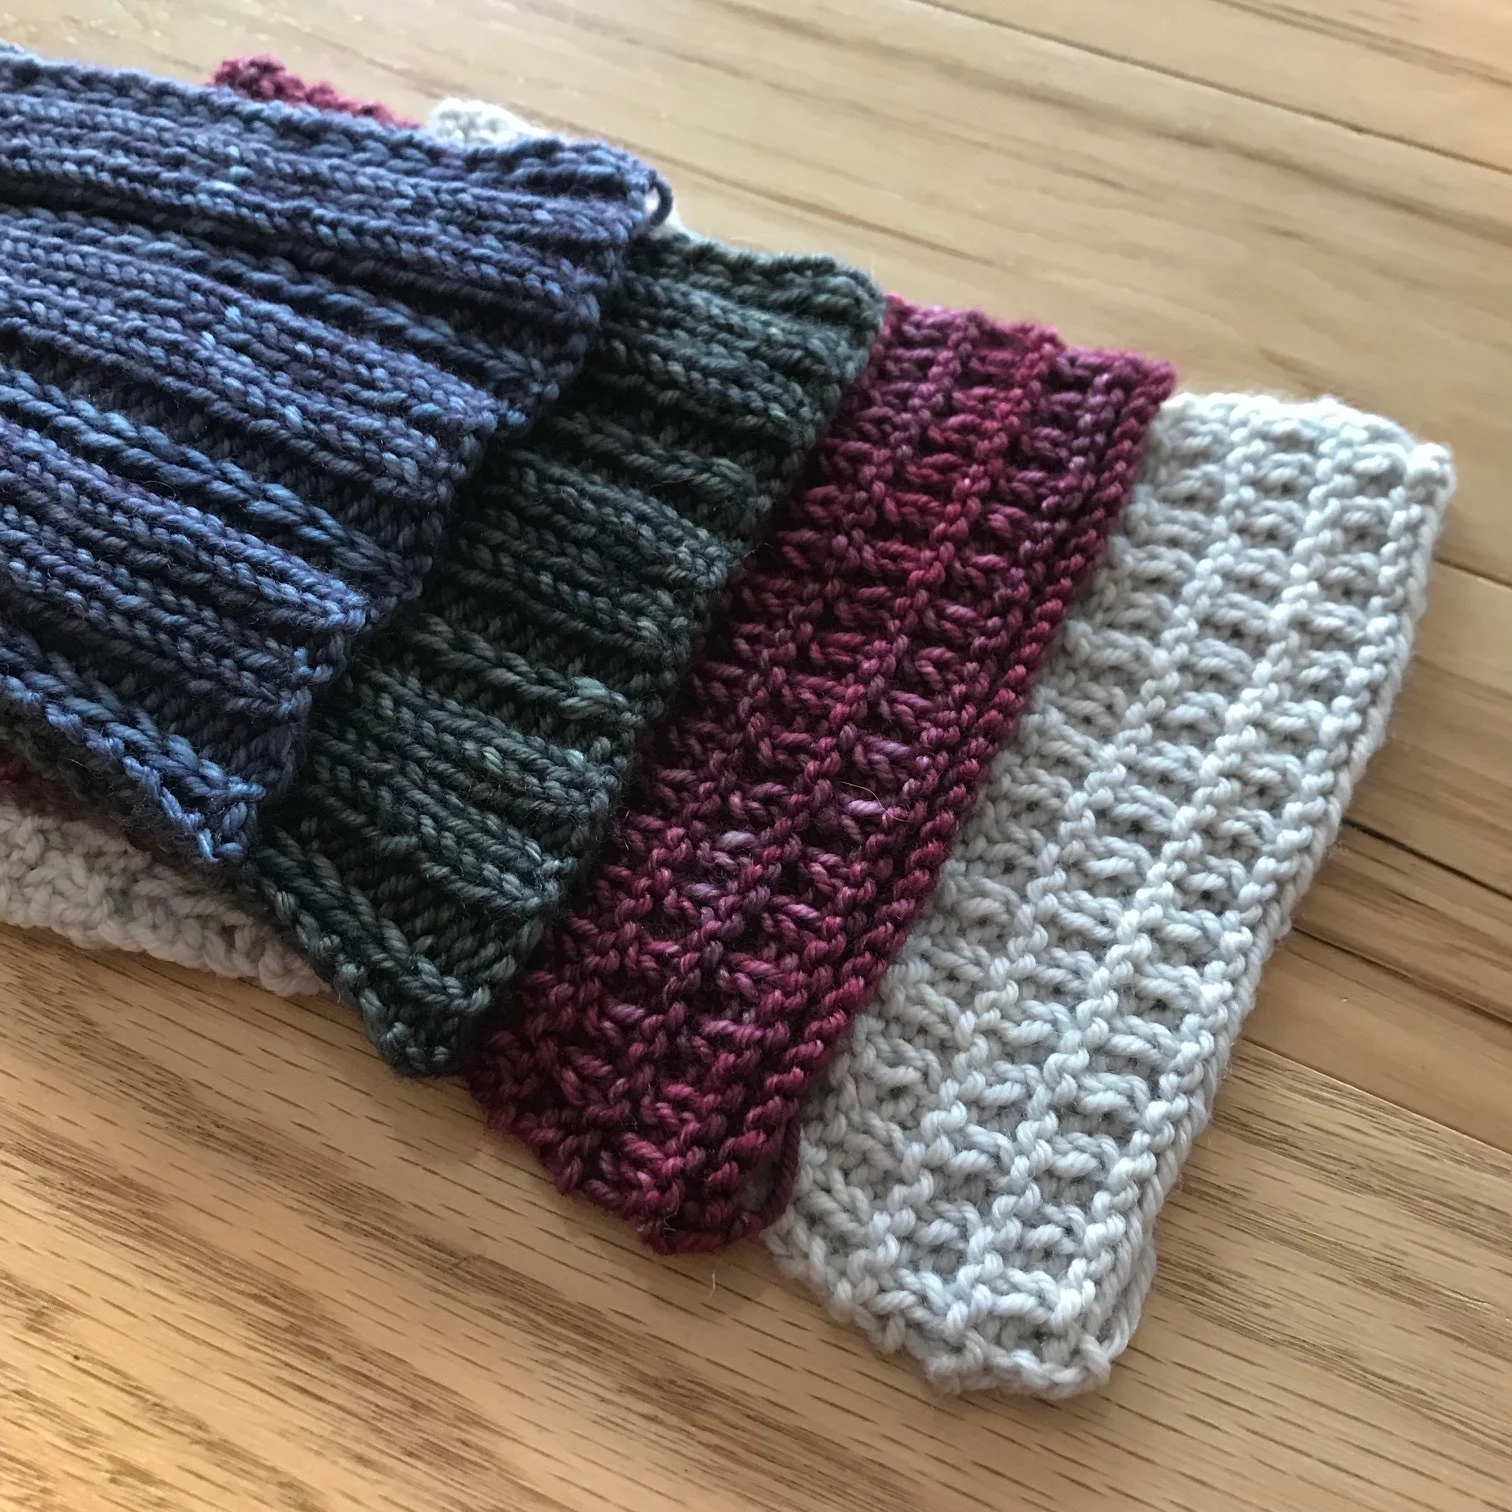
I’ll be at Stitches West for the third year in a row in the YOTH Yarns booth; it’ll be the second year with Fiber & Hue and for the first time, I’m actually going to have my own little pop up shop in the booth too. So, it made so much sense for us all to work together for this KAL! Fiber & Hue Go to DK yarn will provide a very similar drape and fit as the YOTH Yarns Big Sister (shown on me, above) and Krista (the maker behind F&H) was kind enough to knit up a few swatches in pattern to show you how it works up. The colors below are called Siren, Troll, Frida & Ghost.
So without further adieu, here are the awesome yarn options we have come up with that we recommend for this KAL! Stay tuned to instagram as we chat more about how these fibers will produce slightly different fabrics. You can also see our test knitter’s projects on Ravelry. They look so good!
YOTH Yarns Neighbor (featured)
YOTH Yarns Big Sister (featured)
Fiber & Hue Go To DK
YOTH Yarns Daughter

YOTH Yarns is offering 10% off Neighbor, Big Sister and Daughter bases for our KAL with the code LEEWRAPTASTIC. Fiber & Hue is offering 15% off Go to DK purchases over $200 with the code LEEWRAP and you can get the pattern for $2 off from me with the code LEEWRAPTASTIC as well. All these deals are valid now through our KAL start date, January 22, 2019. When you purchase the pattern on Ravelry, you’ll be provided with a spec sheet that includes yardage information along with total skeins for each of our recommended yarns. You will also receive swatching instructions so you can get started on that as soon as you have your yarn in hand! And of course you are welcome to use any yarn you want in our KAL so I will look forward to seeing what other beautiful selections are represented, too.

I hope you are ready to jump on in and join me! I can’t wait for us to get started. This pattern is totally suitable for adventurous beginning knitters so do not be shy. Feel free to challenge yourself this year with this project. If you know how to knit and purl, cast on and bind off, you can knit this sweater. That’s the great thing about KALs, plenty of help is available for any questions that arise. The other great thing about KALs? Prizes. We will announce our prizes at the start of the KAL. They will be yummy and yarny!

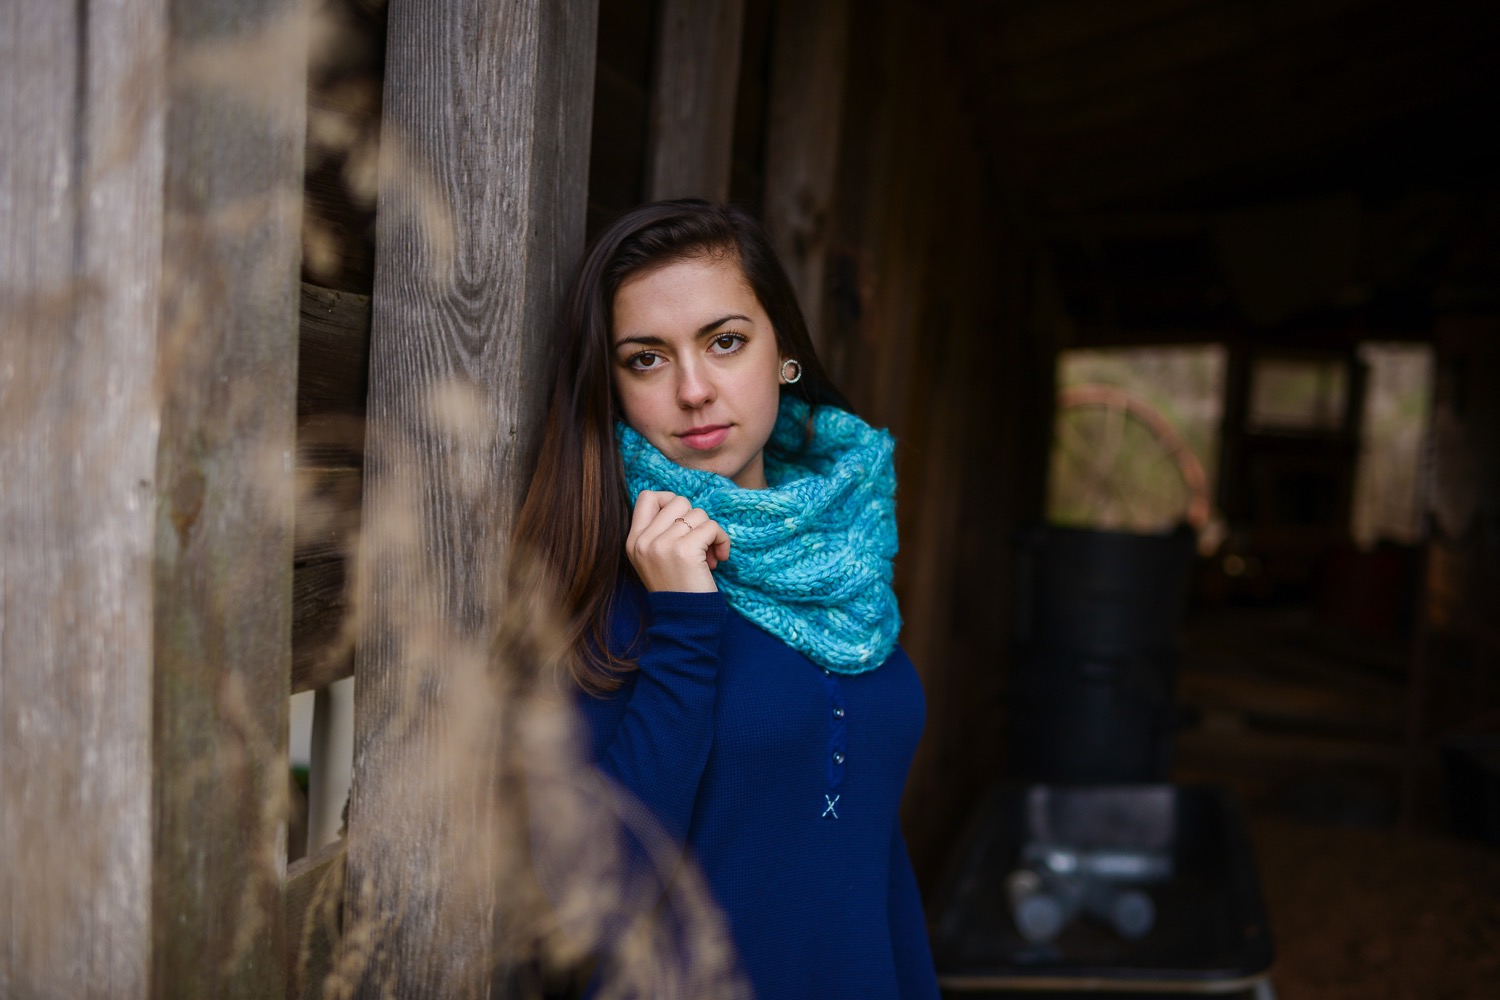
Knitting Left & Right Twists, or Crossovers
This "cabled" stitch is worked without a cable needle and is used in such designs as the Lee Wrap, Lee Blanket, Shifty Cowl, Mary Swanson Cardi-Vest, Master Charles Cabled Ear Flap Hat, Dindy Beret, etc. This video features the Lee designs, but the technique is the same. In some of my earlier designs, I labeled the Right Twist as “Crossover,” they are the same stitch.
Enjoyed this tutorial? Consider a donation to help me continue to create tutorials for knitters! Thank you SO much!

Weaving in Loose Ends
Weaving in loose ends
Using duplicate stitch on reverse stockinette. I'm terribly sorry about the lack of manicure.
Enjoyed this tutorial? Consider a donation to help me continue to create tutorials for knitters! Thank you SO much!

Decreasing in Cable
This is the process I use when working the Gramps Cardigan (child or adult) to cross my cable stitches on a decrease row before actually performing the neckline & raglan decreases. See step-by-step instructions are directly below the video.
Step-by-step instructions
1) Knit your first st (the selvedge st).
2) IF your cabled stitches include any portion of the sts that will be used in the decrease (which would be stitches 2 and 3 of the row), sl sts until you get to your cable (this could be 0 or 1 sts, depending on where your cable begins).
3) Sl sts to cable needle, hold to front or back, sl next sts to RH needle but do not knit/purl these sts, then sl the sts from the cable needle to the RH needle as well. You should now be able to see the cable twist on your RH needle.
4) Sl all of the cable sts on your RH needle, one at a time, back to your LH needle.
5) Perform your ssk on the first two sts, then work the remaining sts in pattern and continue to the end of the row (or section, for the raglan decreases).
Once you get to the end of the row, you’ll want to parallel this side with your right front. I think its easier because you don’t have to do as much slipping back and forth, you can go ahead and work each stitch as you come to it and then when you get down to the last 3, you do your k2tog, k1.
In step 3, you are welcome to slip the sts from the CN directly to the LH needle once you get comfortable doing it. I only suggest taking them to the right first so that you can look at your twist and make sure you’ve done things in the proper direction.
Helpful Links (mentioned in the video)
The Step-by-step instructions mentioned are right above this section :)
FAQ page
KnittingHelp.com Cabling Without a Needle Tutorial
Kate's Ravelry Group & Forum
Enjoyed this tutorial? Consider a donation to help me continue to create tutorials for knitters! Thank you SO much!

Fringe

Insert crochet hook into single purl bump (or into whatever you need).

Pull the loop through from top to bottom.


Insert strand ends through the loop.

Pull snugly.

Sweet as pie! You've got fringe. Repeat as many times as necessary.
Enjoyed this tutorial? Consider a donation to help me continue to create tutorials for knitters! Thank you SO much!
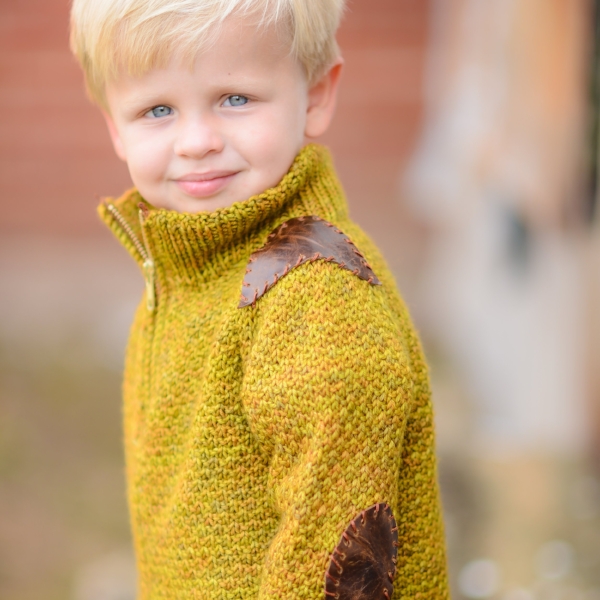
Leather Patches
Leather patches are an adorable compliment to your handknits. Enjoy these templates free of charge, and watch the video below for full details on how to make your own elbow patches! If you're not keen on making your own, purchase handmade patches here.

Click here to download the printable template for making your own Elbow Patches.
Click here to download the printable template for making your own Shoulder Patches as featured in the Grove Pullover.
Download the printable instructions for making your own Elbow Patches as referenced in the video. Watch the video if you want some tips & tricks, or need help with the instructions.
Enjoyed this tutorial? Consider a donation to help me continue to create tutorials for knitters! Thank you SO much!

Onesie Neckline
The Onesie Neckline Join
This neckline is featured in a few different patterns including Baby Tee (from New Girl). The photos below are also included in the New Girl Booklet. This neckline join is a bit fiddly to perform but once you get it, it is very satisfying and so great for babies and toddlers. I hope seeing these photos will help to clarify any questions!
I am using two different colors for the front and back to make sure you can see what is going on and how you should be holding your pieces. The green is the Back and while the off white is the Front. Note that this tutorial begins after the Left and Right Fronts are joined together as that section is fairly straightforward and I have not gotten any questions about that section. Also note that there is no edging on these pieces since that treatment is handled differently depending on the design. If you are working the Baby Tee, you should have completed your collar ribbing before performing this join in order to minimize stretching. For Swaddle Smock, the edging is crocheted on during finishing.

Get to know your pieces: the back should still be on circular needles while the sts from the front were placed onto two DPNs after the Left and Front were joined. The DPNs are labeled according to when the sts were slipped on to them; DPN 2 will actually be used first during the join.

Next, line things up for the first join. You'll be holding two needles together in a similar fashion as for a 3-needle bind-off. Hold the circular needle with the sts from the Back on top of DPN 2. You will be starting at the very beginning of the RS row for the Back sts and working with the last sts when facing the RS of the Front.

Your working needle for the join is the circular needle, NOT DPN 1. Ignore DPN 1, and insert your circular needle into the first st from the Back and the first stitch from DPN 2 all at once, then knit these 2 sts together, placing the new stitch onto your circular needle.

Above shows the completed join of the Back with Front sts from DPN 2. This section is the Left Sleeve with one raglan st on either side. The next step is to continue knitting across the Back sts to get to the location of the second part of the join.

Now, all that's left to do is to get DPN 1 in place and perform the exact same join as you did to create the Left Sleeve overlap. Make sure that you undo any twisting of your fabric or sts on DPN 1 before you get set, as you will not be able to fix that after your join. Layer the Back on top of the DPN 1 Front sts just as for the first join. You will be working with the sts at the very beginning of the RS row for the Front sts and working with the last sts when facing the RS of the Back.

And voila! Once you knit 2 together through all of your Back sts, your join is complete. To finish up, continue knitting the remaining Front sts onto your circular needle.

Take a deep breath, the "hard" part is over :) Now you have an accommodating neckline with no fear of whether it will slip on and off easily.
Above is Swaddle Smock all finished up, and below is Baby Tee. Cute AND functional... a Tot Toppers goal achieved.

Enjoyed this tutorial? Consider making a donation to help me continue to create tutorials for knitters! Thank you SO much.
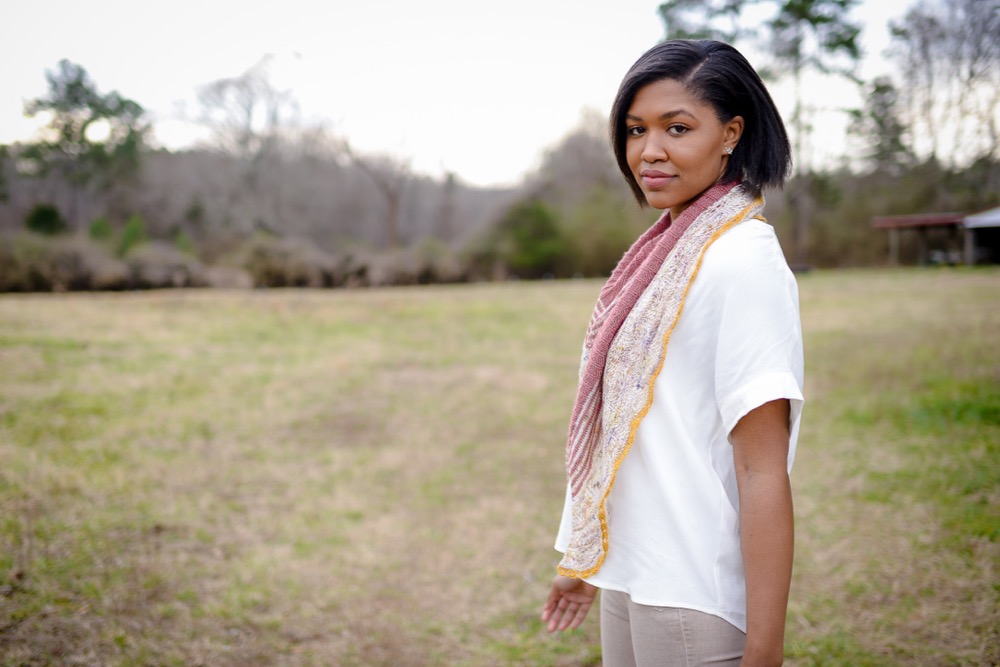
A Spinster Duo + Stitches West

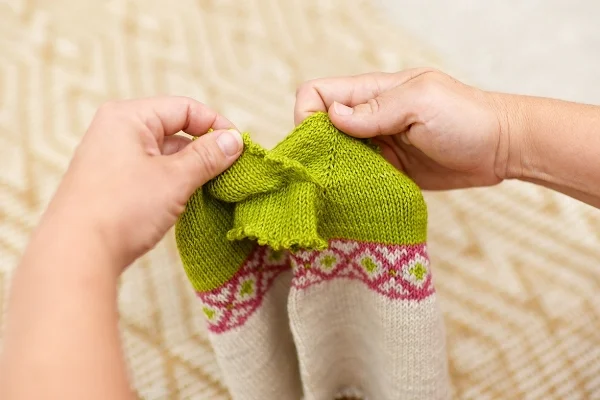
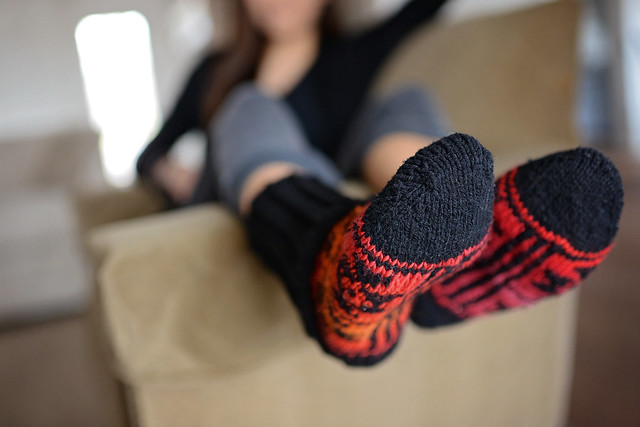
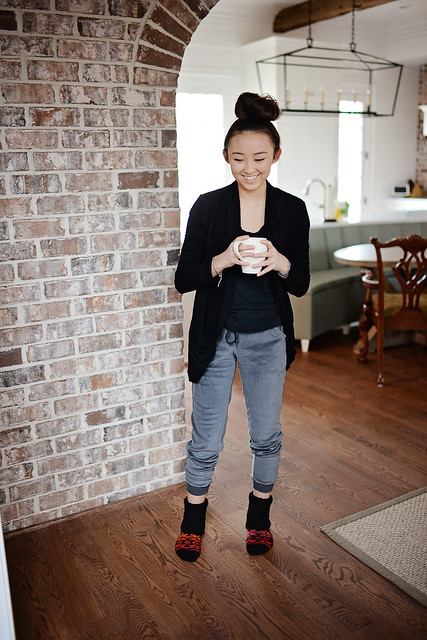
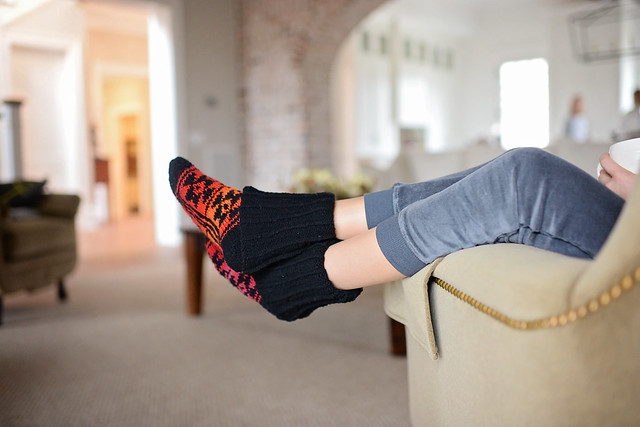
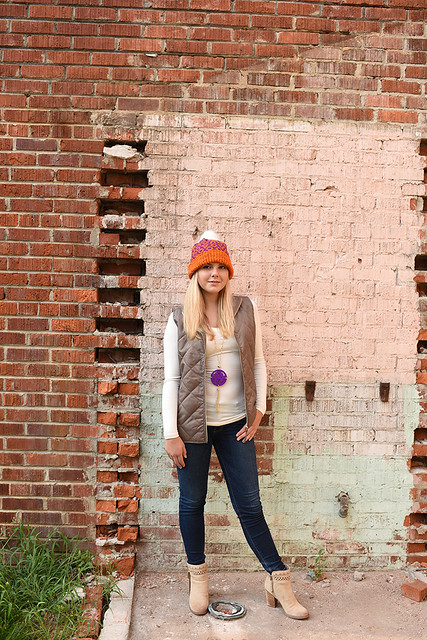
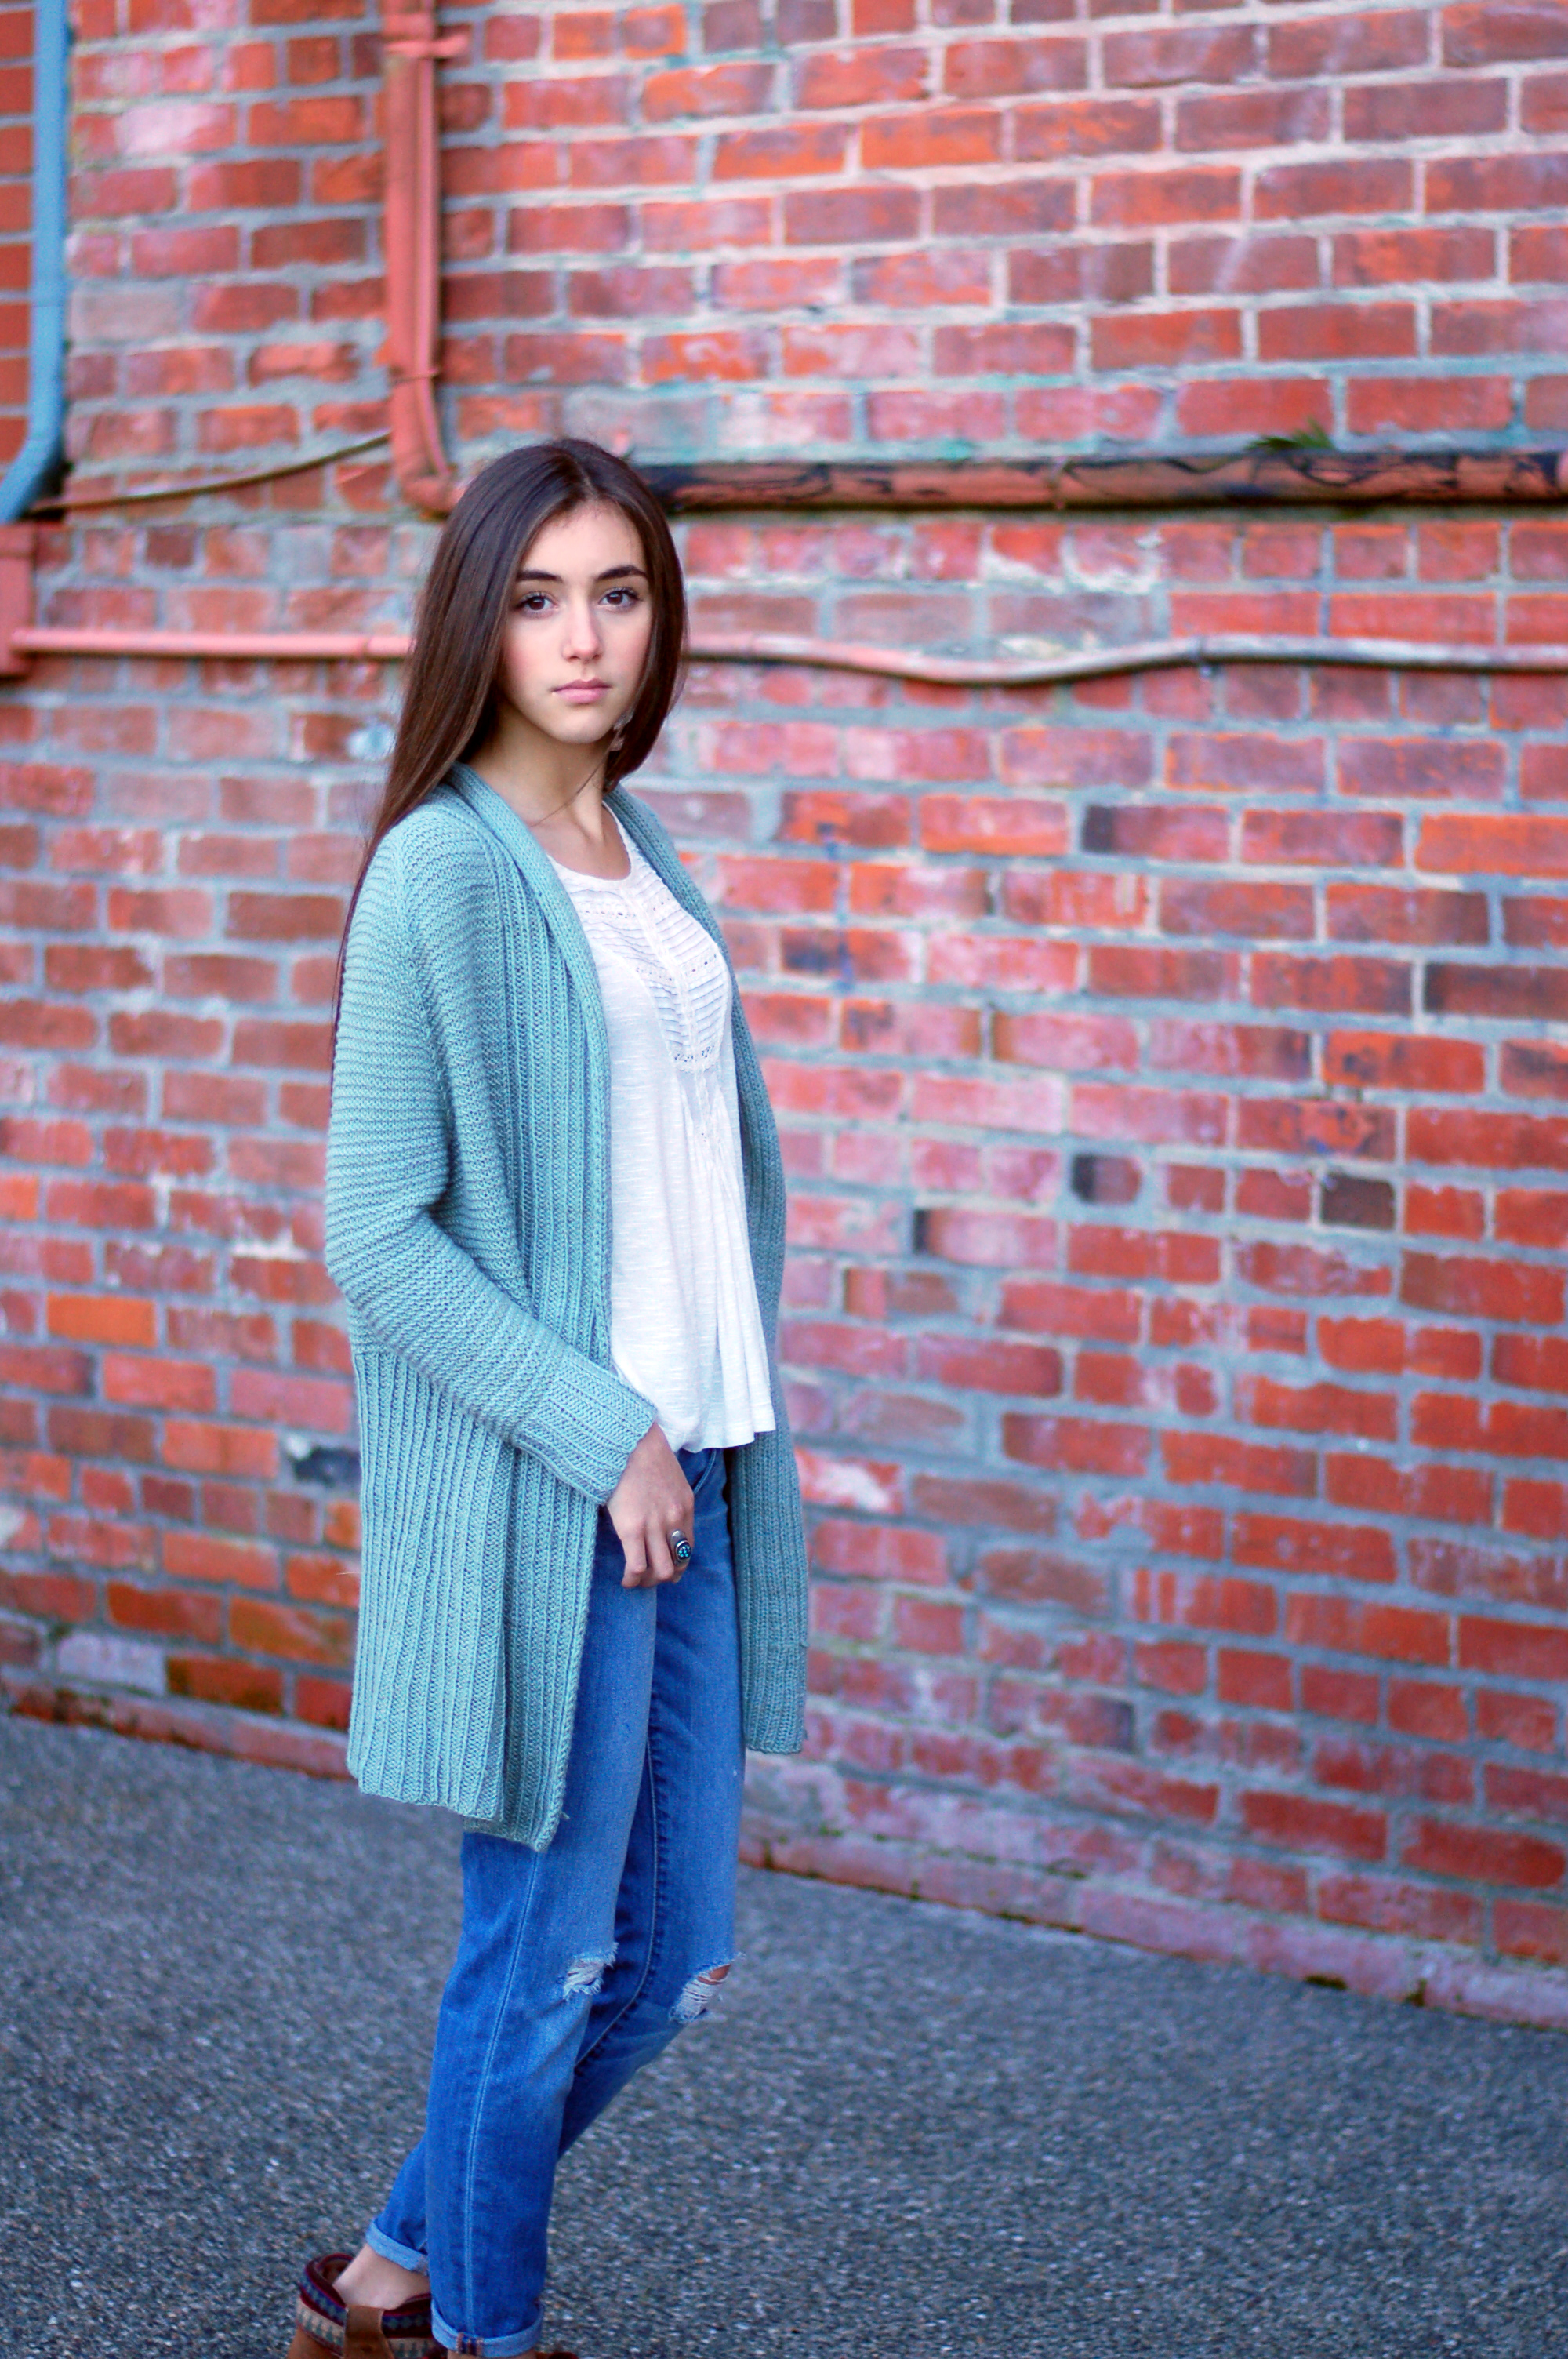
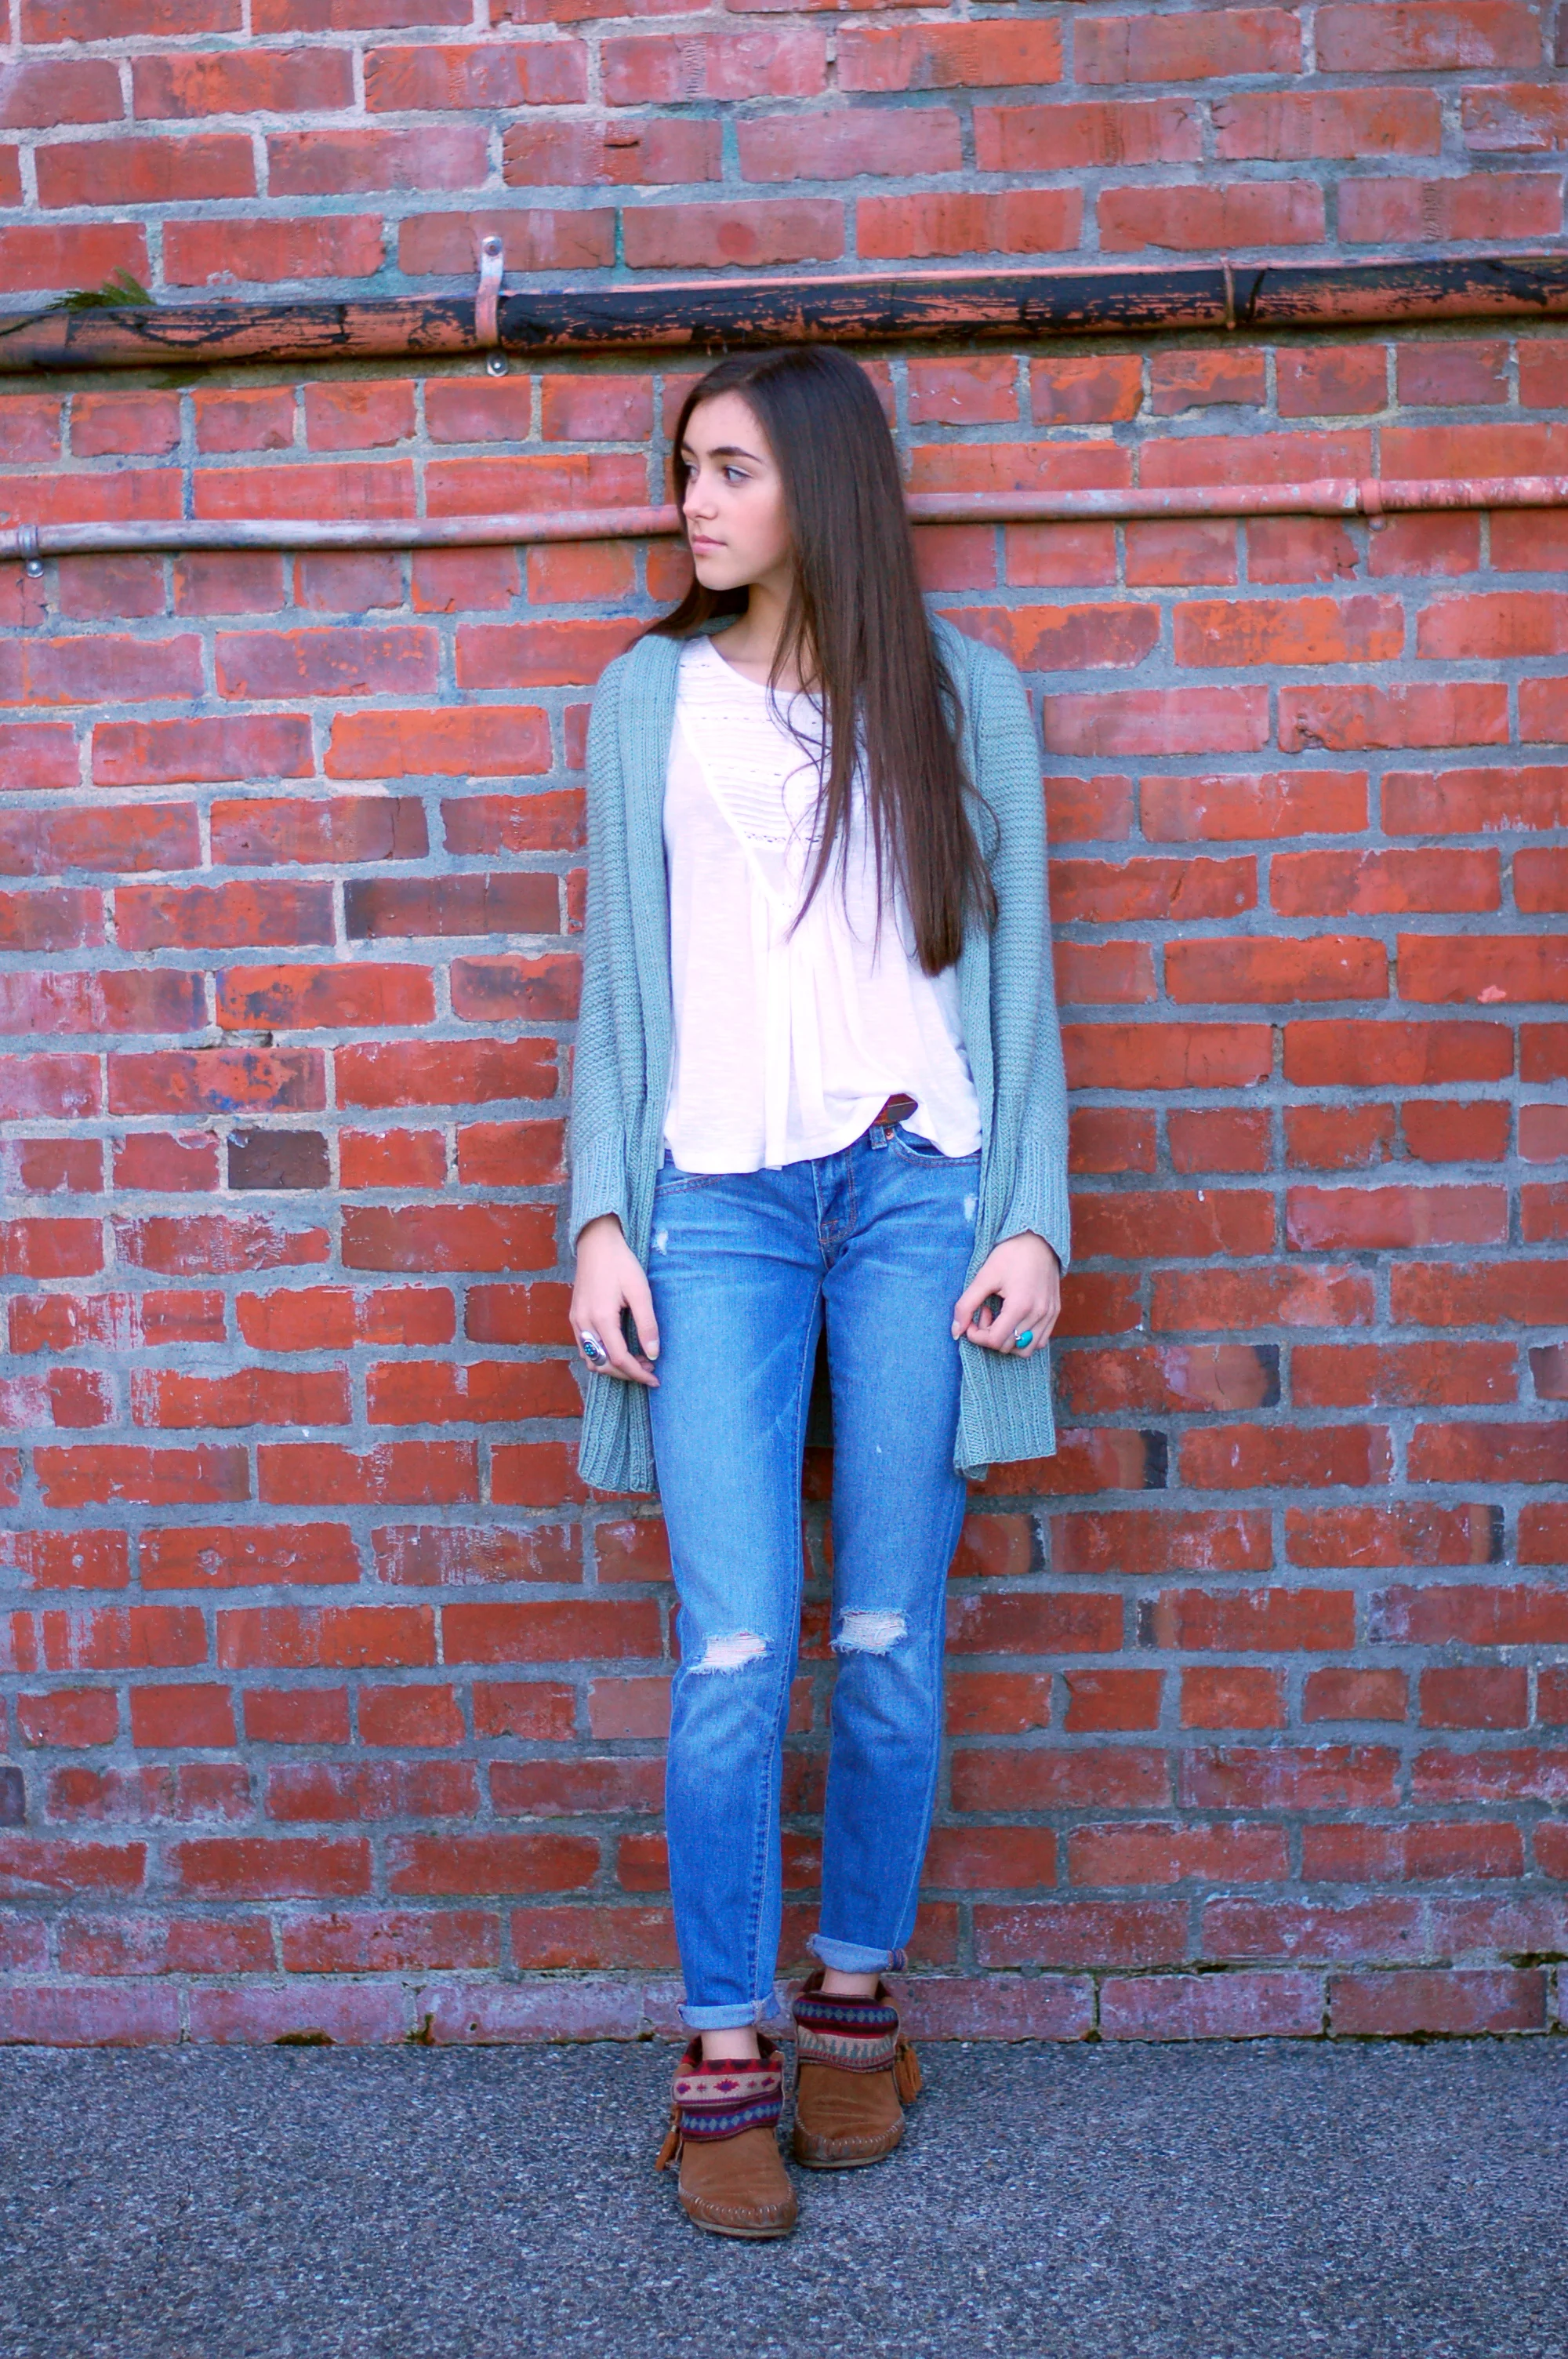
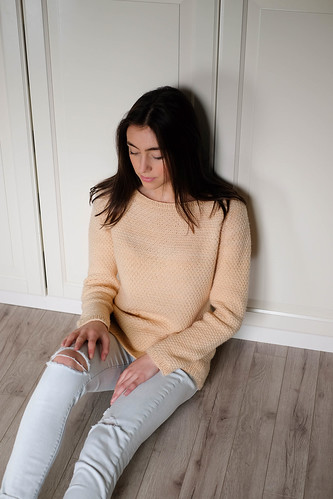
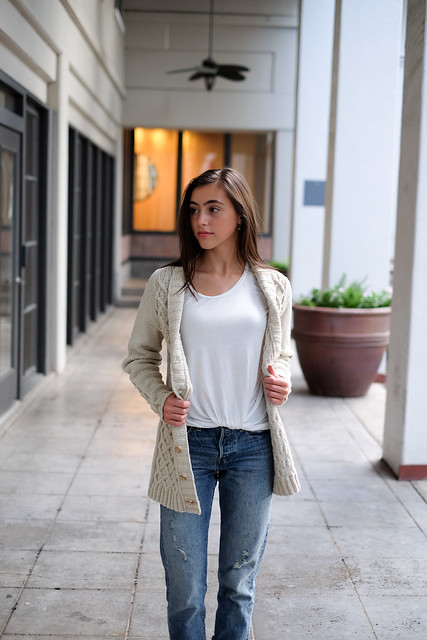
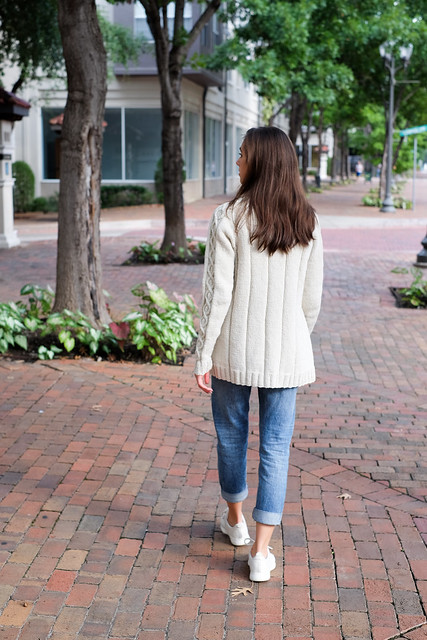
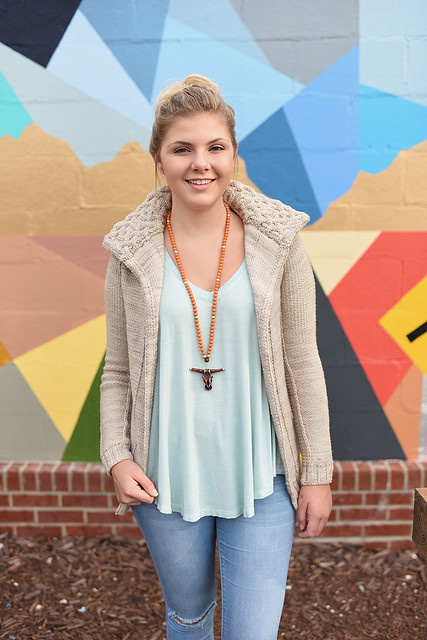
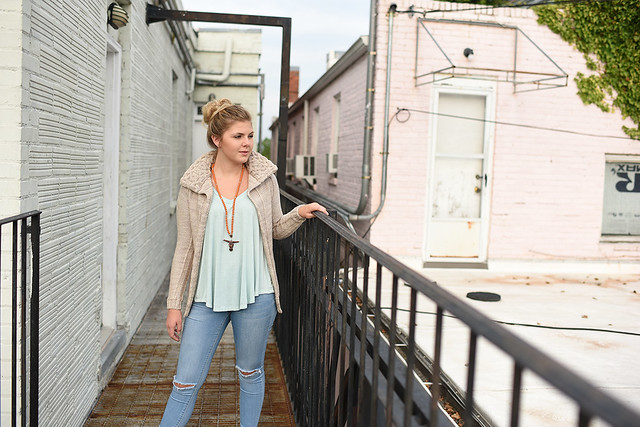
I have two new patterns to share today. They are very different but they have one very important thing in common: gorgeously unique Spincycle Yarn. I think on the very best kind of Saturday, you can wake up with cozy Switchback Slippers...
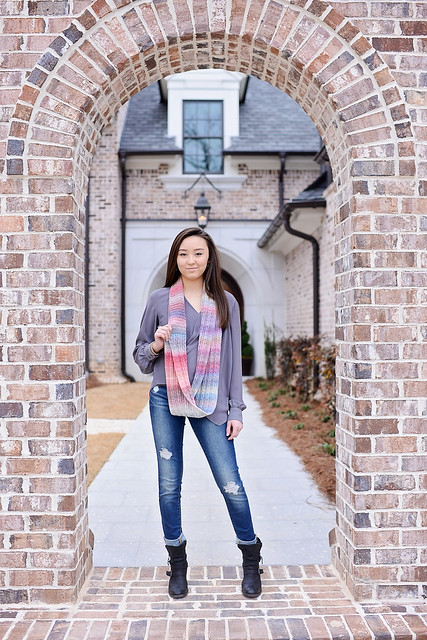
...then once you've had your coffee (or Diet Coke), you can get glammed up for a day out with your Shifty Cowl.
Both of these design samples will be available for petting in the Spincycle Booth at Stitches West where you can get your yarn on and also snag a hard copy of each of the patterns. Read on for loads of design info and backstory on both of these.
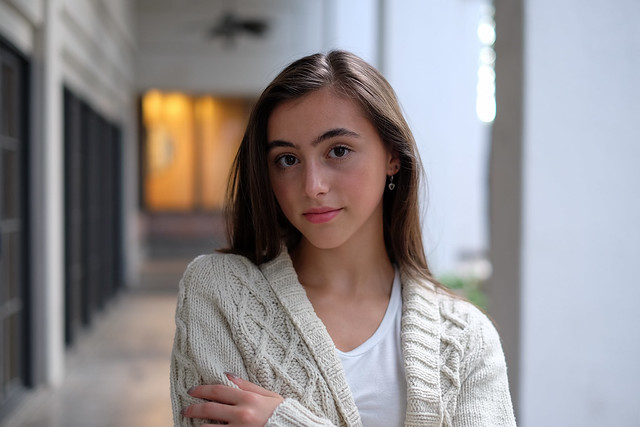
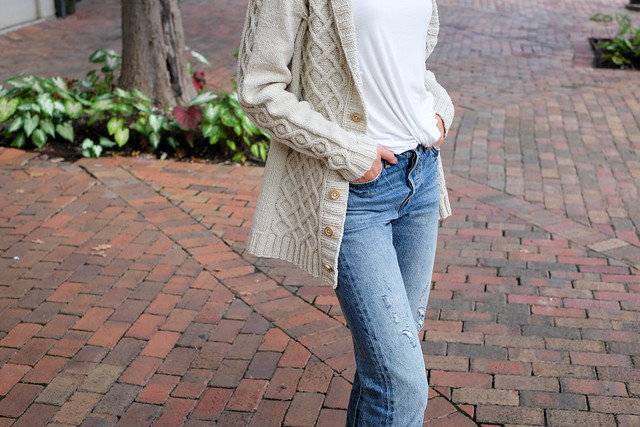
Patterns: Shifty Cowl & Switchback Slippers Photography: Erica B. Studio + Design Yarn for Cowl: Spincycle Yarns Dyed in the Wool in Strata Yarn for Slippers: YOTH Yarns Daughter in Black Truffle with Spincycle Yarns Independence in Devilish Grin Cowl Styled by Poshture Boutique; click to shop the Top, Jeans & Jewelry
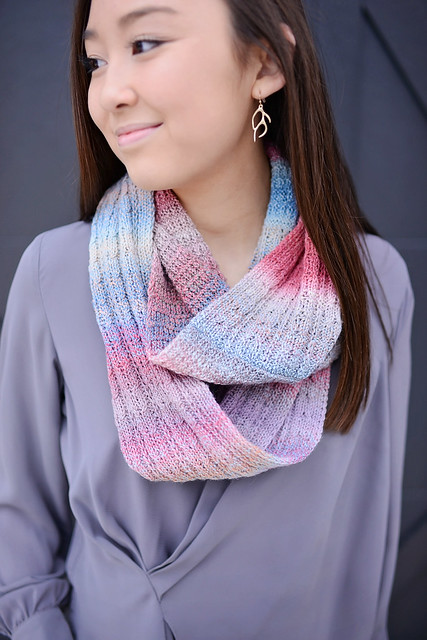
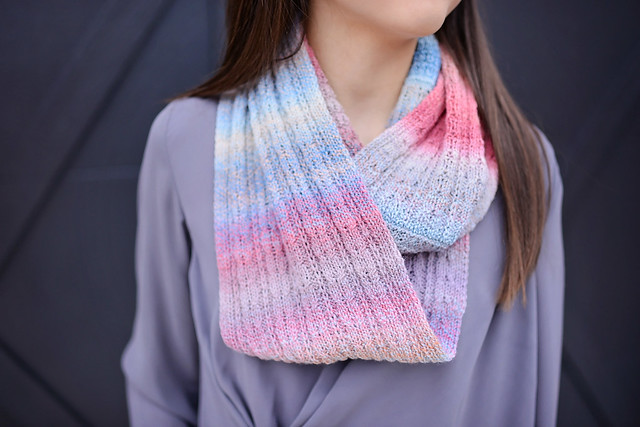
I designed the cowl first and it is actually based on a stitch pattern I recently developed for a blanket. I am really particular about blankets. I don't like to have to pick up edges and I don't like having a "wrong side" but I also love textured fabric and cables, so in my swatching I was committed to figuring out how to do something that could encompass all of my favorite things. The solution was a series of twists and slipped stitches that shift on both sides to make the fabric totally reversible. I found this fabric so addicting to knit and had to create a wearable garment with it in addition to my original plan.

I pitched my idea to the Spinsters and they were so good to me; they sent a colorway of Dyed in the Wool that they developed for the Stitches West show called Strata. If you're attending the show, you'll have first dibs to snap up this dreamy gradient. The cowl features a shifting rib for your first skein and the twisty texture for the other two; the pattern also tells you just how to make the most of your precious Spincycle Yarn. The pieces are twisted before the final join so that the cowl lays nicely whether hanging long or doubled.

This cowl is a one-size pattern that is suitable for adventurous beginning knitters. There is a lot of technical instruction included in the pattern such as directions for provisional cast-on and three-needle bind-off. No cable needles are needed either.
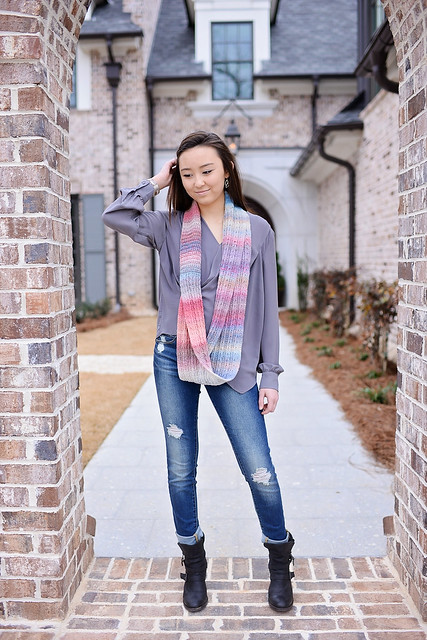
I love how our model, Belle, is wearing her cowl. Thanks so much to Poshture for styling another shoot for me. Links for her outfit are at the top of the page. Thanks also to my sample knitter, Krista, for working hard on this for the Stitches deadline. She worked on the cowl because I had my Switchback Slippers on the needles! This pair is worked with YOTH Daughter as the base and Spincycle Independence as that smashing pop of color.
Spinster Kate (or Tall Kate as I like to call her) sent me an idea for some slippers months ago, after we chatted at Rhinebeck. It took me some time to put my thoughts together and it also took me knitting the first slipper three separate times before I got what I wanted. It is always worth the time and effort though, once you get just the right thing.
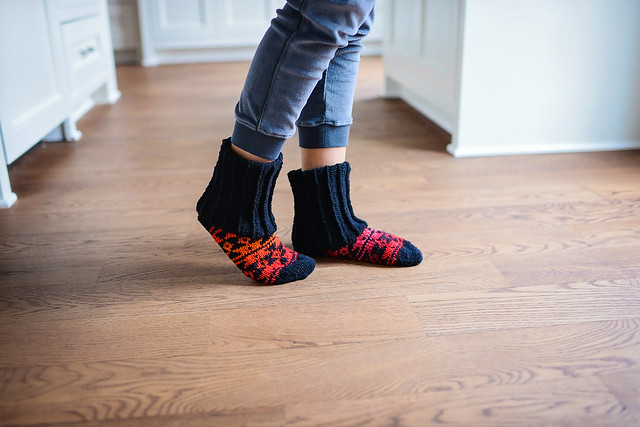
The stitch pattern for the sole of these slipper-socks was adapted from Andrea Rangel's book, Alterknit. This is such a great book. Not only are the motifs stunning, there are so many great tips that can improve your colorwork such as discussions of color dominance and catching floats to improve your tension. I also love how Andrea explains the name of the book because I wholeheartedly agree with her style of rule-breaking. I think my first stranded colorwork design was Diplodocus (years ago!); it features longer floats and at the time, I really wasn't educated enough to realize this was untraditional as it was not my first time knitting such a motif. Since then I've learned enough to give folks a little warning when I do this. These slippers do not follow all the traditional Fair Isle rules as there are indeed longer floats that I suggest catching, but I love the freedom this gives when tweaking a motif to fit the purposes of a design. Sometimes you just don't get exactly what you want without pushing boundaries a bit.
I hit my stride with the motif in my first knit of the slipper because charts are awesome, but then came the struggle for how to do the ankle. I experimented with a shorter bootie, buttons, wraps and garter stitch but ultimately landed on a twisted rib with some bonus fabric for the cozy factor. And even after I settled on that, I redid the cuff one more time to get them just so.
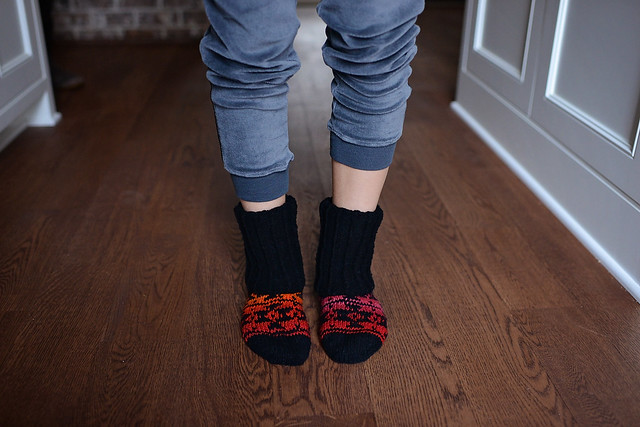
These slippers are worked from the toe up with a no-wrap short row heel. I do recommend having some prior colorwork experience before working these slippers. Although the stranding section isn't huge, the longer floats do make it a little trickier to keep your tension steady. If you're not knitting each slipper three times like I did, you'll find these will knit up very quickly, maybe in time for your next lazy morning.

The slipper pattern includes 4 sizes for men and women. I suggest choosing a size that is close to your actual foot circumference instead of smaller as is the norm for socks. The stranding inhibits the fabric stretch a bit but makes them nice and fluffy.
I am very much looking forward to the show later this week and I hope to meet some new faces along with giving hugs to my favorite spinsters!! Love you Rach & Kate and hope you enjoy short Kate's first adventures with your yarn.
As I mentioned last week, during the show you can find me in the YOTH booth. Here are just a few of the samples I will have with me there:

Come say hi! See you at the show! Let's go yarn shopping! Whoop whoop!
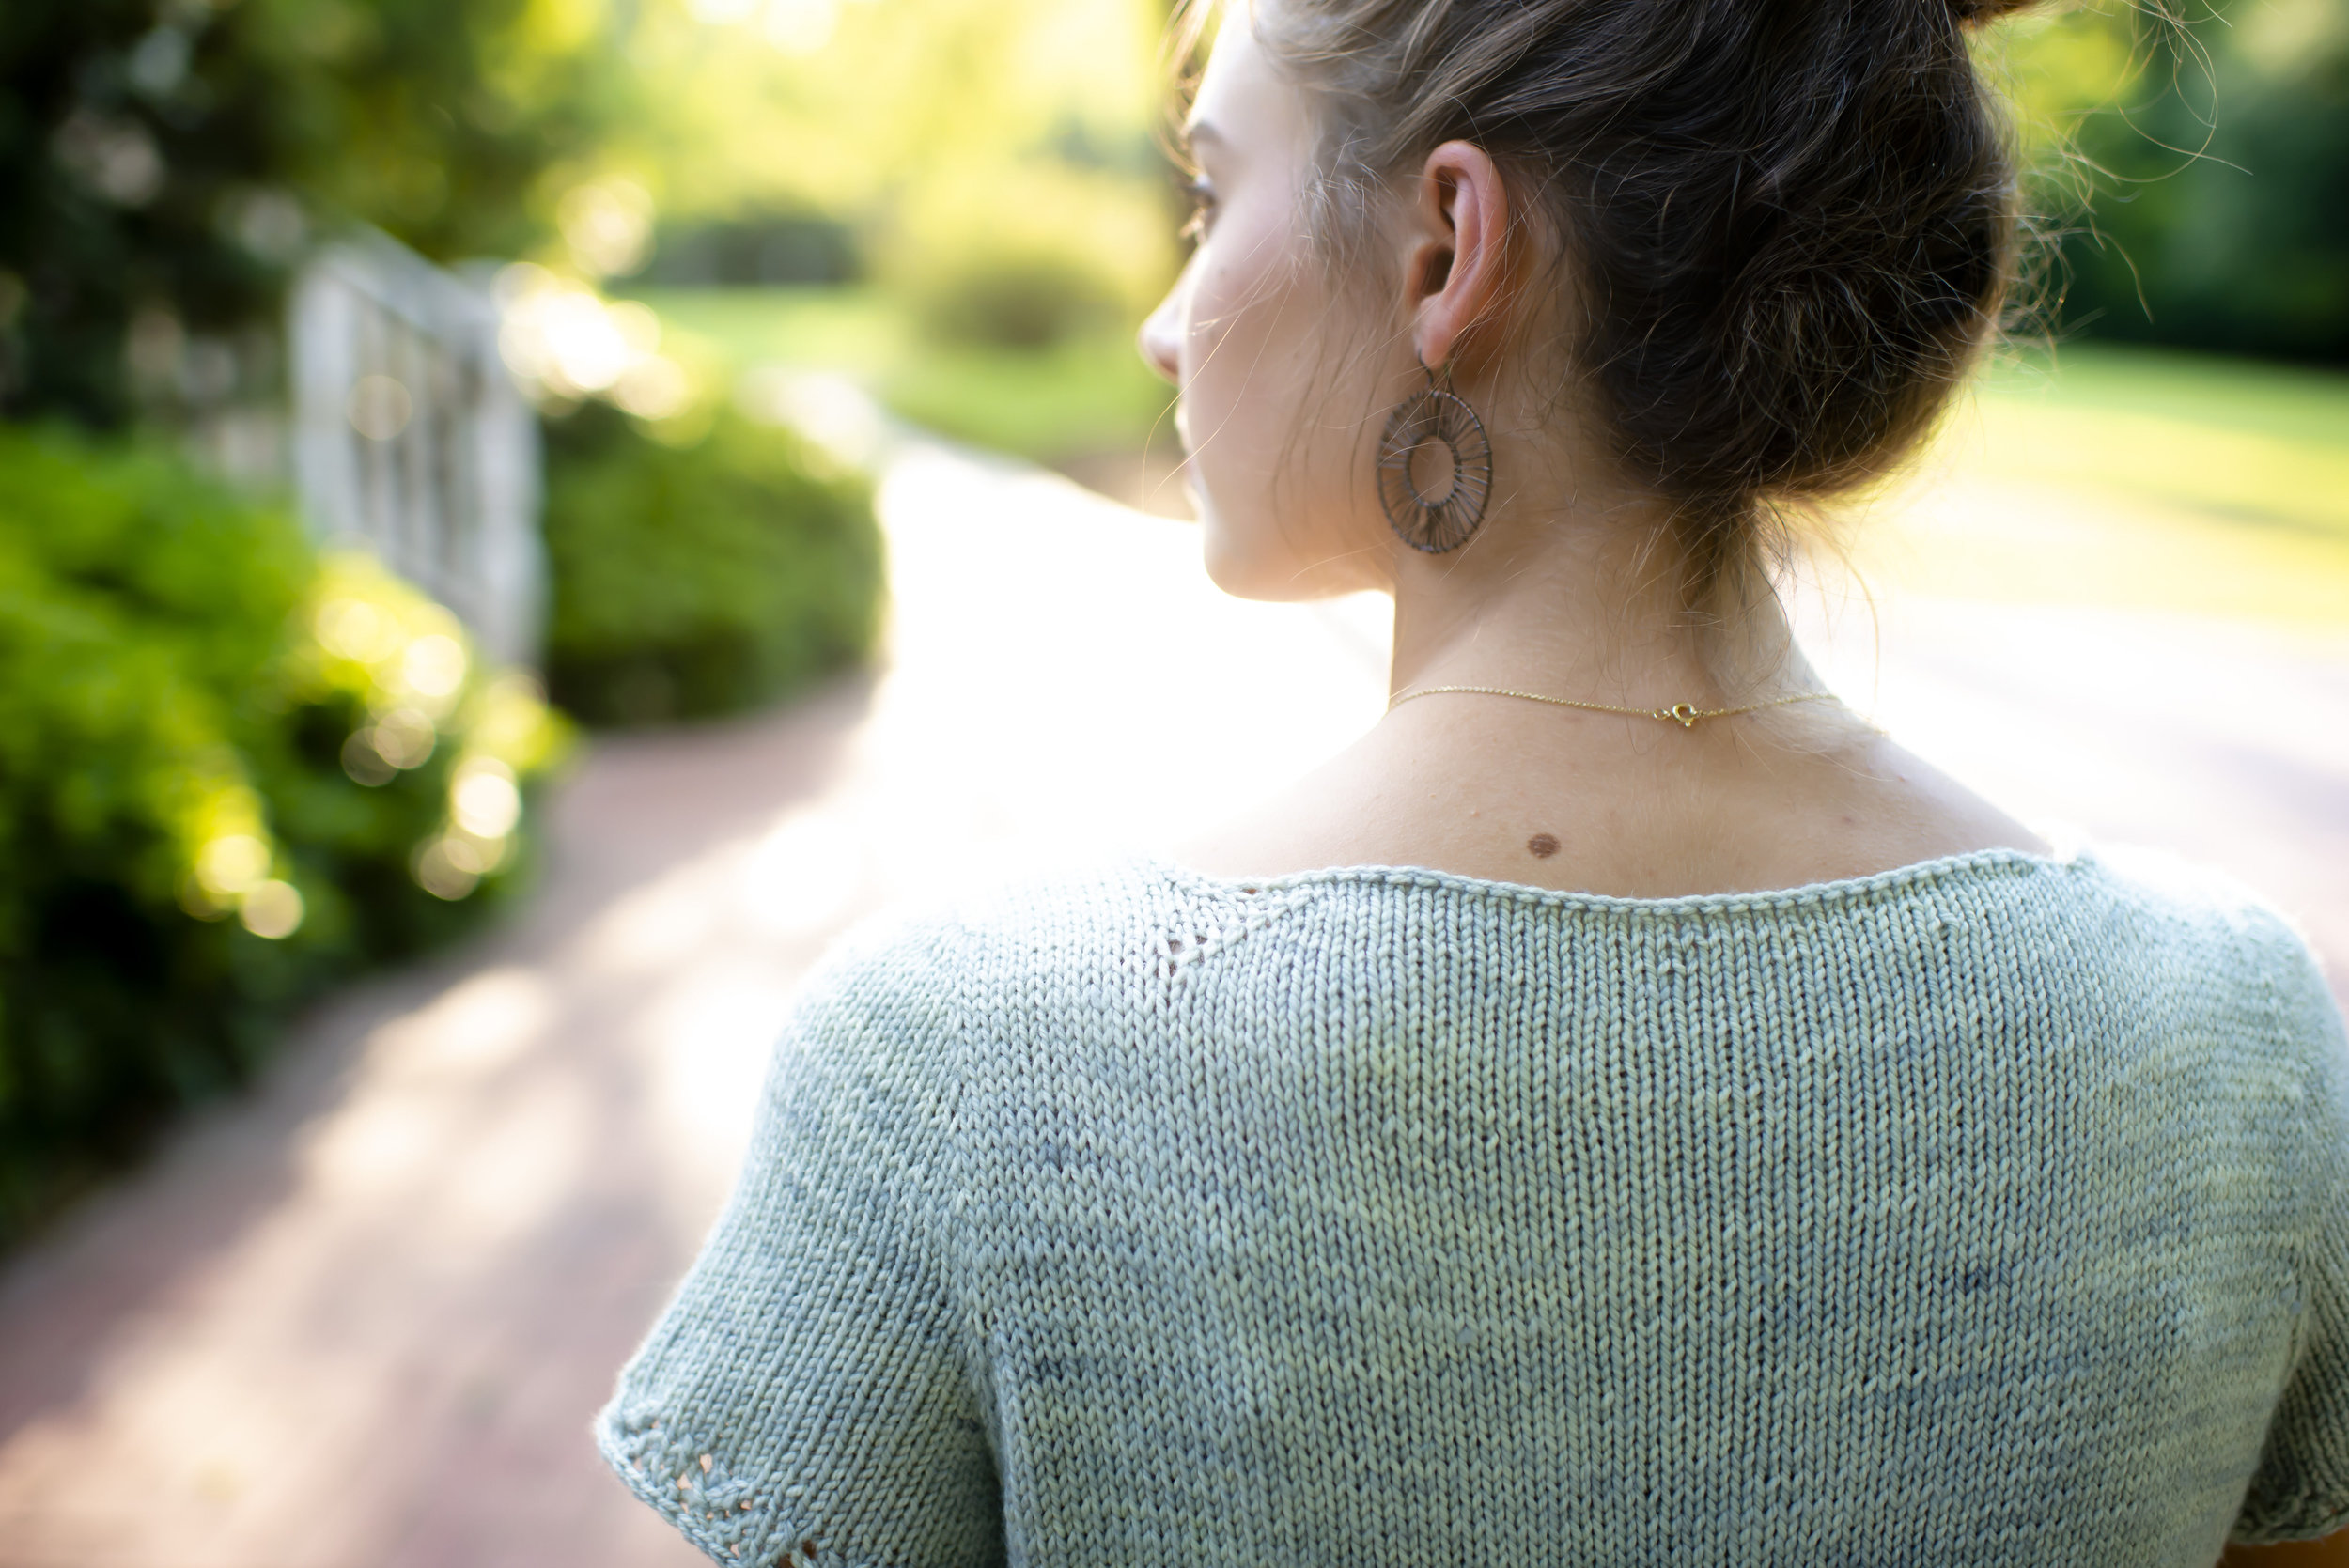
Trailing Lace
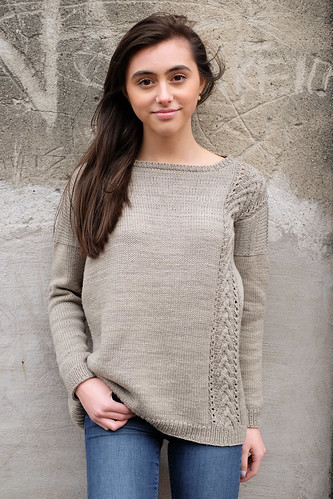
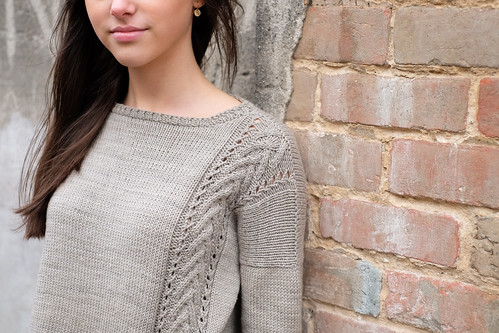
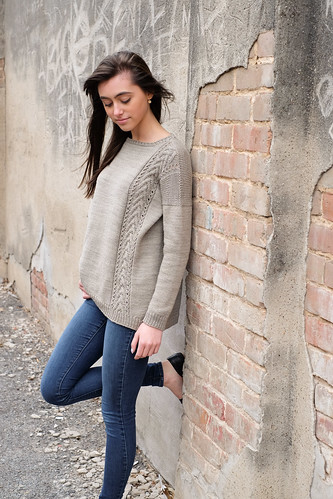
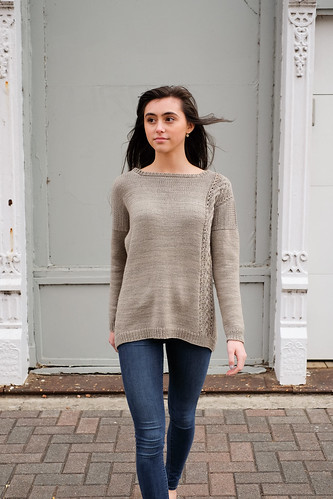
I love cookies. And Diet Coke, bread, cheese, wine... ok I love food in general. The kitchen is my happy place. As a result, my favorite things to wear tend to be forgiving. So, this new sweater design is just the thing! Trailing Lace is a stunning blousy drop-sleeve pullover that works with whatever you happen to eat that day thanks to the generous 10-15" of positive ease.
I am also very into details. This sweater is worked from the top down and features an asymmetrical lace-cable panel. The repeat is easy to memorize and even if you've never ventured into this type of stitch pattern, you will catch right on.

There are also just a handful of short rows at the bottom to give a slight hi-lo hemline. I am a big fan of a little extra backside coverage. These short rows are quick and easy, so don't be nervous even if you haven't tried them before. Directions are included in the pattern and it is a great opportunity to learn. The delicate neckline is somewhere in the grey area between crew and boat. I wanted it to be wide enough to be springy and breezy but still wanted to fit in the lace-cable panel in full width at the shoulder.
I had a wonderful group of knitters that worked with me on a preview knit for this design, you can already check out a myriad of beautifully finished sweaters in other colors and yarns on Ravelry. While you're over there, you can add the pattern to your queue.
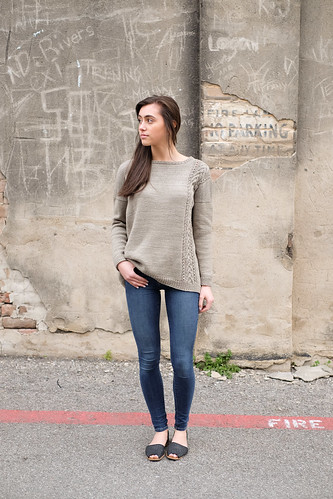
In my sample, I used YOTH Yarns Big Sister in Shiitake. This yarn has beautiful drape and stitch definition. Veronika took these beautiful pictures of her daughter Jasmine for the design and I love how she styled it. Leggings and boots would be great with it too if you're wearing it through the winter in a cold climate.
If you feel like you've seen something similar to this from me before, you might be thinking of Winding Trail. The construction and cut of the adult sweater is completely different but the stitch patterns are very similar. Trailing Lace was inspired by Winding Trail just like the designs from my last book Grown were inspired by other Tot Toppers designs. I find that once I get a look I love, my brain really enjoys adapting it for different audiences. You can totally mommy & me this set.
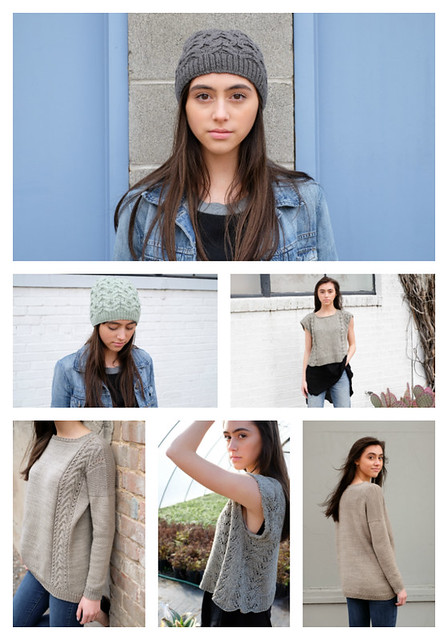
I'm heading out to Stitches West next week for the third year in a row! You can come see me along with this sweater along with lots of other samples in the YOTH booth. I would love to meet you and to help you pick out some yarn for your next project. :) Trailing Lace was part of a trio of patterns released for YOTH at Stitches; take a look at Thea Colemans gorgeous Agave (hat) and Reposado (tank) designs in the collage below. They will be at the booth too although sadly Thea won't be there this year.
After Stitches, I'm really thinking about starting a KAL for this design. It has been a while since I've hosted a KAL and this one is so tempting since there might be a few folks out there that need some encouragement to try cabling or short rows for the first time. If you'd be interested in a KAL, make sure you are on my mailing list so you'll be notified. Or join up in my Ravelry Group to see all the latest goings-ons on regularly.
Thanks for reading all about my latest design, I would love to hear what you think of this sweater. Leave me a comment, come see me at Stitches, or visit me on instagram!
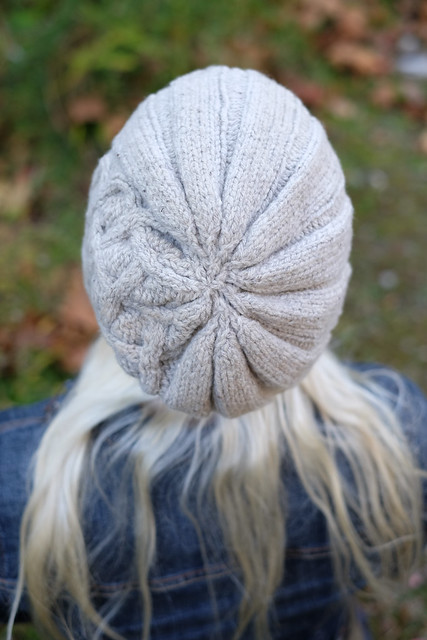
reGramps Slouch
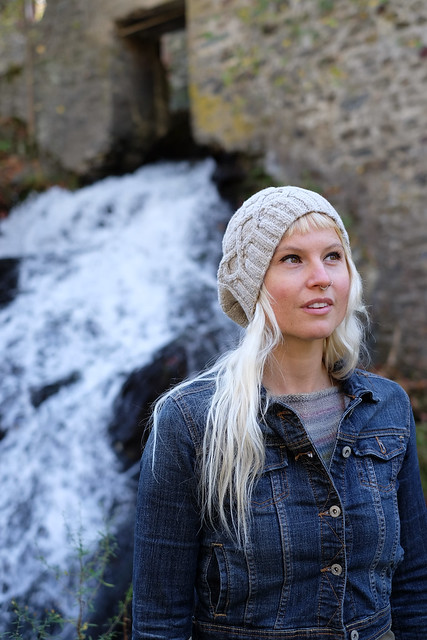
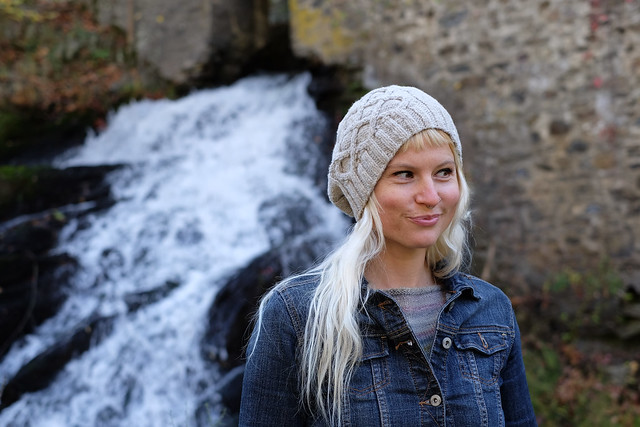
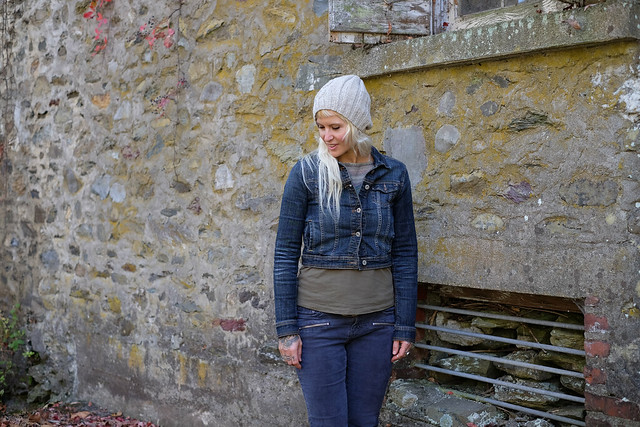
Last month I got to go to Rhinebeck, NY to the New York Sheep & Wool Festival for the first time ever. I loved everything about it, the landscape, the foliage, the animals, the shopping but more than anything...the people. I got to stay in an incredible old mill house with some beautiful people, inside and out. One of them was willing to be my photographer and another agreed to model the updated version of Gramps Slouch.
This Gramps is modeled by Kate Burge which you will recognize from Spincycle Yarns. I knit the hat in YOTH Daughter and behind the camera was Veronika the multitalented. Daughter has frequented my needles a lot the past few months, I just can't help it. After finishing a new sweater design (forthcoming) with the Natural Oatmeal colorway, I had a skein left and it was too perfect not to use it for a hat makeover.
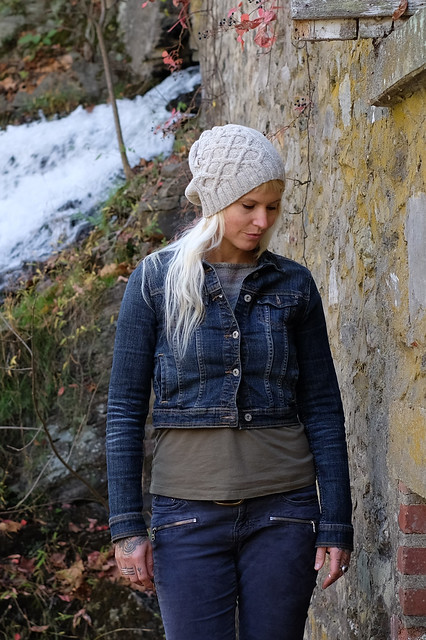
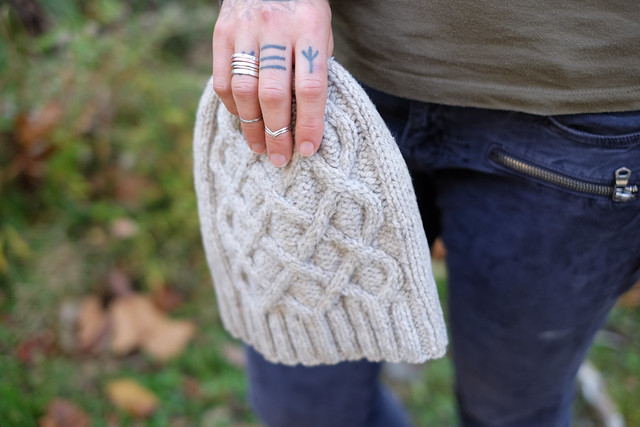
I changed just a few rounds of the crown shaping at the very top because I decided I wanted to retain the stockinette background instead of the original reverse stockinette. The gauge is tweaked to reflect the yarn change but other than that, the design is the same and now has been added to the KO pop-up shop.
We took these photos outside our house where I really hope I get to go again next year. I treasure my time with these women so much. They are all so inspiring and I constantly wonder how I got lucky enough to be included amidst such a group.
If you purchased a previous version of Gramps Slouch you have access to this updated one too. If you're new to the design, you can find it in my online shop, or on Ravelry, or elsewhere my designs are sold.
And PS, I did finish my own Gramps for Rhinebeck. And yes I wore it even though it was warm! #Rhinebecksweatersuccess

Brochan
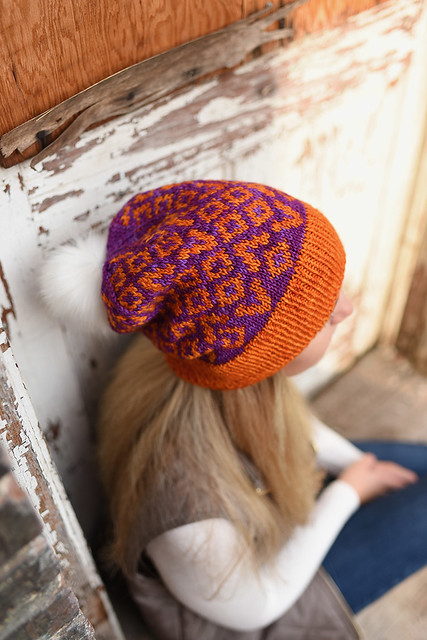
Pattern Update: Brochan Slouch
Photography by Erica B. Studio + Design
Yarn: Dragonfly Fibers Traveller & YOTH Big Sister
Styling by Poshture Boutique; click to shop the Vest & Necklace
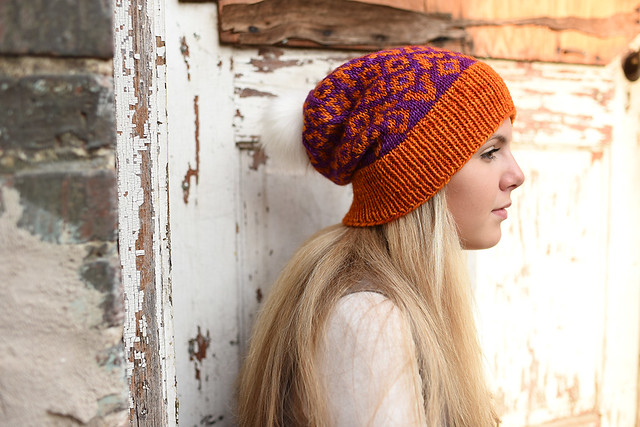
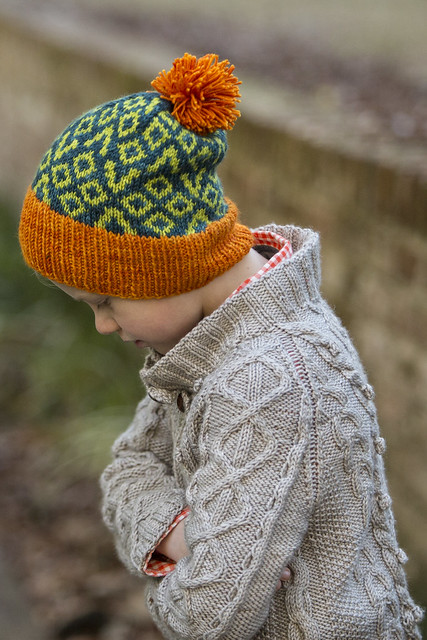
This bottom-up stranded hat can be worn slouchy (above) or more fitted beanie-style with the brim flipped (below). It is sized for all ages, men or women, boy or girl.
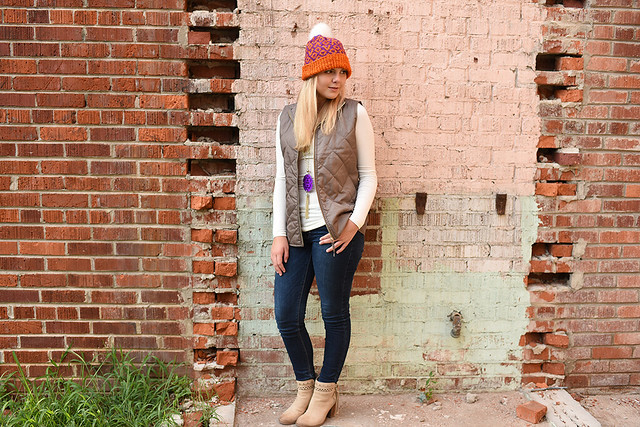
This sassy new sample features a 2-color version (the original pattern features 3) which I utilized with the colors of my Alma Mater, Clemson University. I actually started knitting this one when my husband and I were road tripping to the NCAA College Football Championship game last January. Clemson won so basically this hat brings All the Good Things.
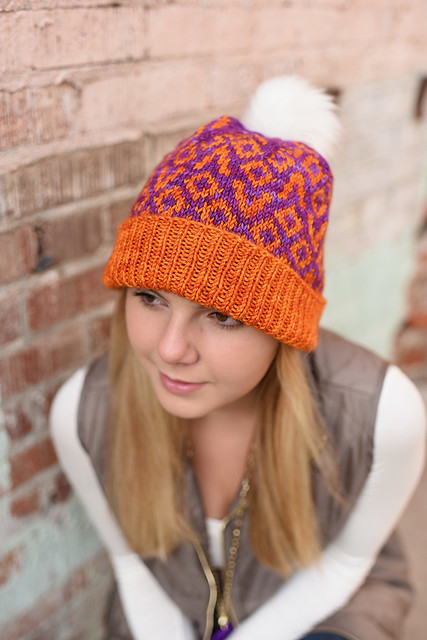
I also used a faux fur pom pom for the first time and I LOVE how fun it is. Plus it is easy and comes out perfect every time, ha!
Brochan is updated with my new format and the 2-color version option; it also includes metric conversions and I was able to make the chart much larger.
The design still includes all the sizes from infant to adult and a couple of the original photos too. Because there were no substantive changes, I decided to include both versions of the pattern in the download. Photo cred below to Veronika Jobe & Kickstand Studio.
The original version is only 2 pages (smaller chart!) and has more pictures of the Child size, so if that suits you better, I figured there was no harm in keeping it available.
Next week I am super excited to be heading to Rhinebeck, NY for the New York Sheep & Wool Festival for the FIRST TIME EVER. I have now completed two Rhinebeck Sweaters...one that is brand stinking new and one of the most challenging patterns just in terms of the writing and grading; it knits really fast but goodness I had to really do a lot of thinking for all the sizes. And the other is a new Gramps Cardigan for ME in YOTH Daughter's new colorway, Natural Oatmeal. Leave me a comment if you have been to the show in the past, are going to the show this year, have any tips for me OR if going is on your bucket list! Come on...that covers most everyone right ;P

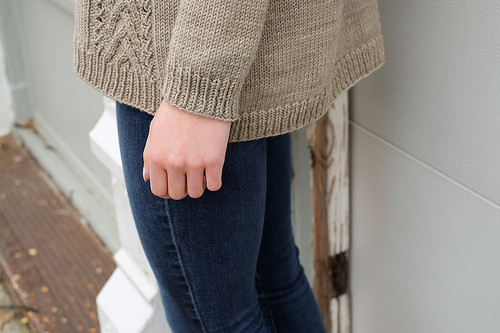
Big Sister
Big Sister = comfy, wearable, stealable sweater, never safe from your little sister :) Knit in YOTH Big Sister in Mint
Shown in size S with 3" positive ease

Photography by Veronika, Modeled by Jasmine
In this latest version of Big Sister, I have added options for long sleeves. The original design featured 3/4 length sleeves worn slightly off the shoulder; now you can do whatever you like without having to do any math or extra thinking.


Other than the sleeve option, the design is substantively the same. I like to think it is a little prettier now though!
This sweater is knit from the top down and is seamless. It is suitable for adventurous beginners. This is a great first-sweater project. Skills required include provisional CO, picking up sts and basic increasing and decreasing. Even if you are trying these skills for the first time, I believe this is a great opportunity to give them a try!
You can find the updated version of Big Sister anywhere my designs are sold including my website and Ravelry.
Included that last image just in case you are into some Matchy Matchy...because the wee version of this design came out earlier this fall. Happy knitting!

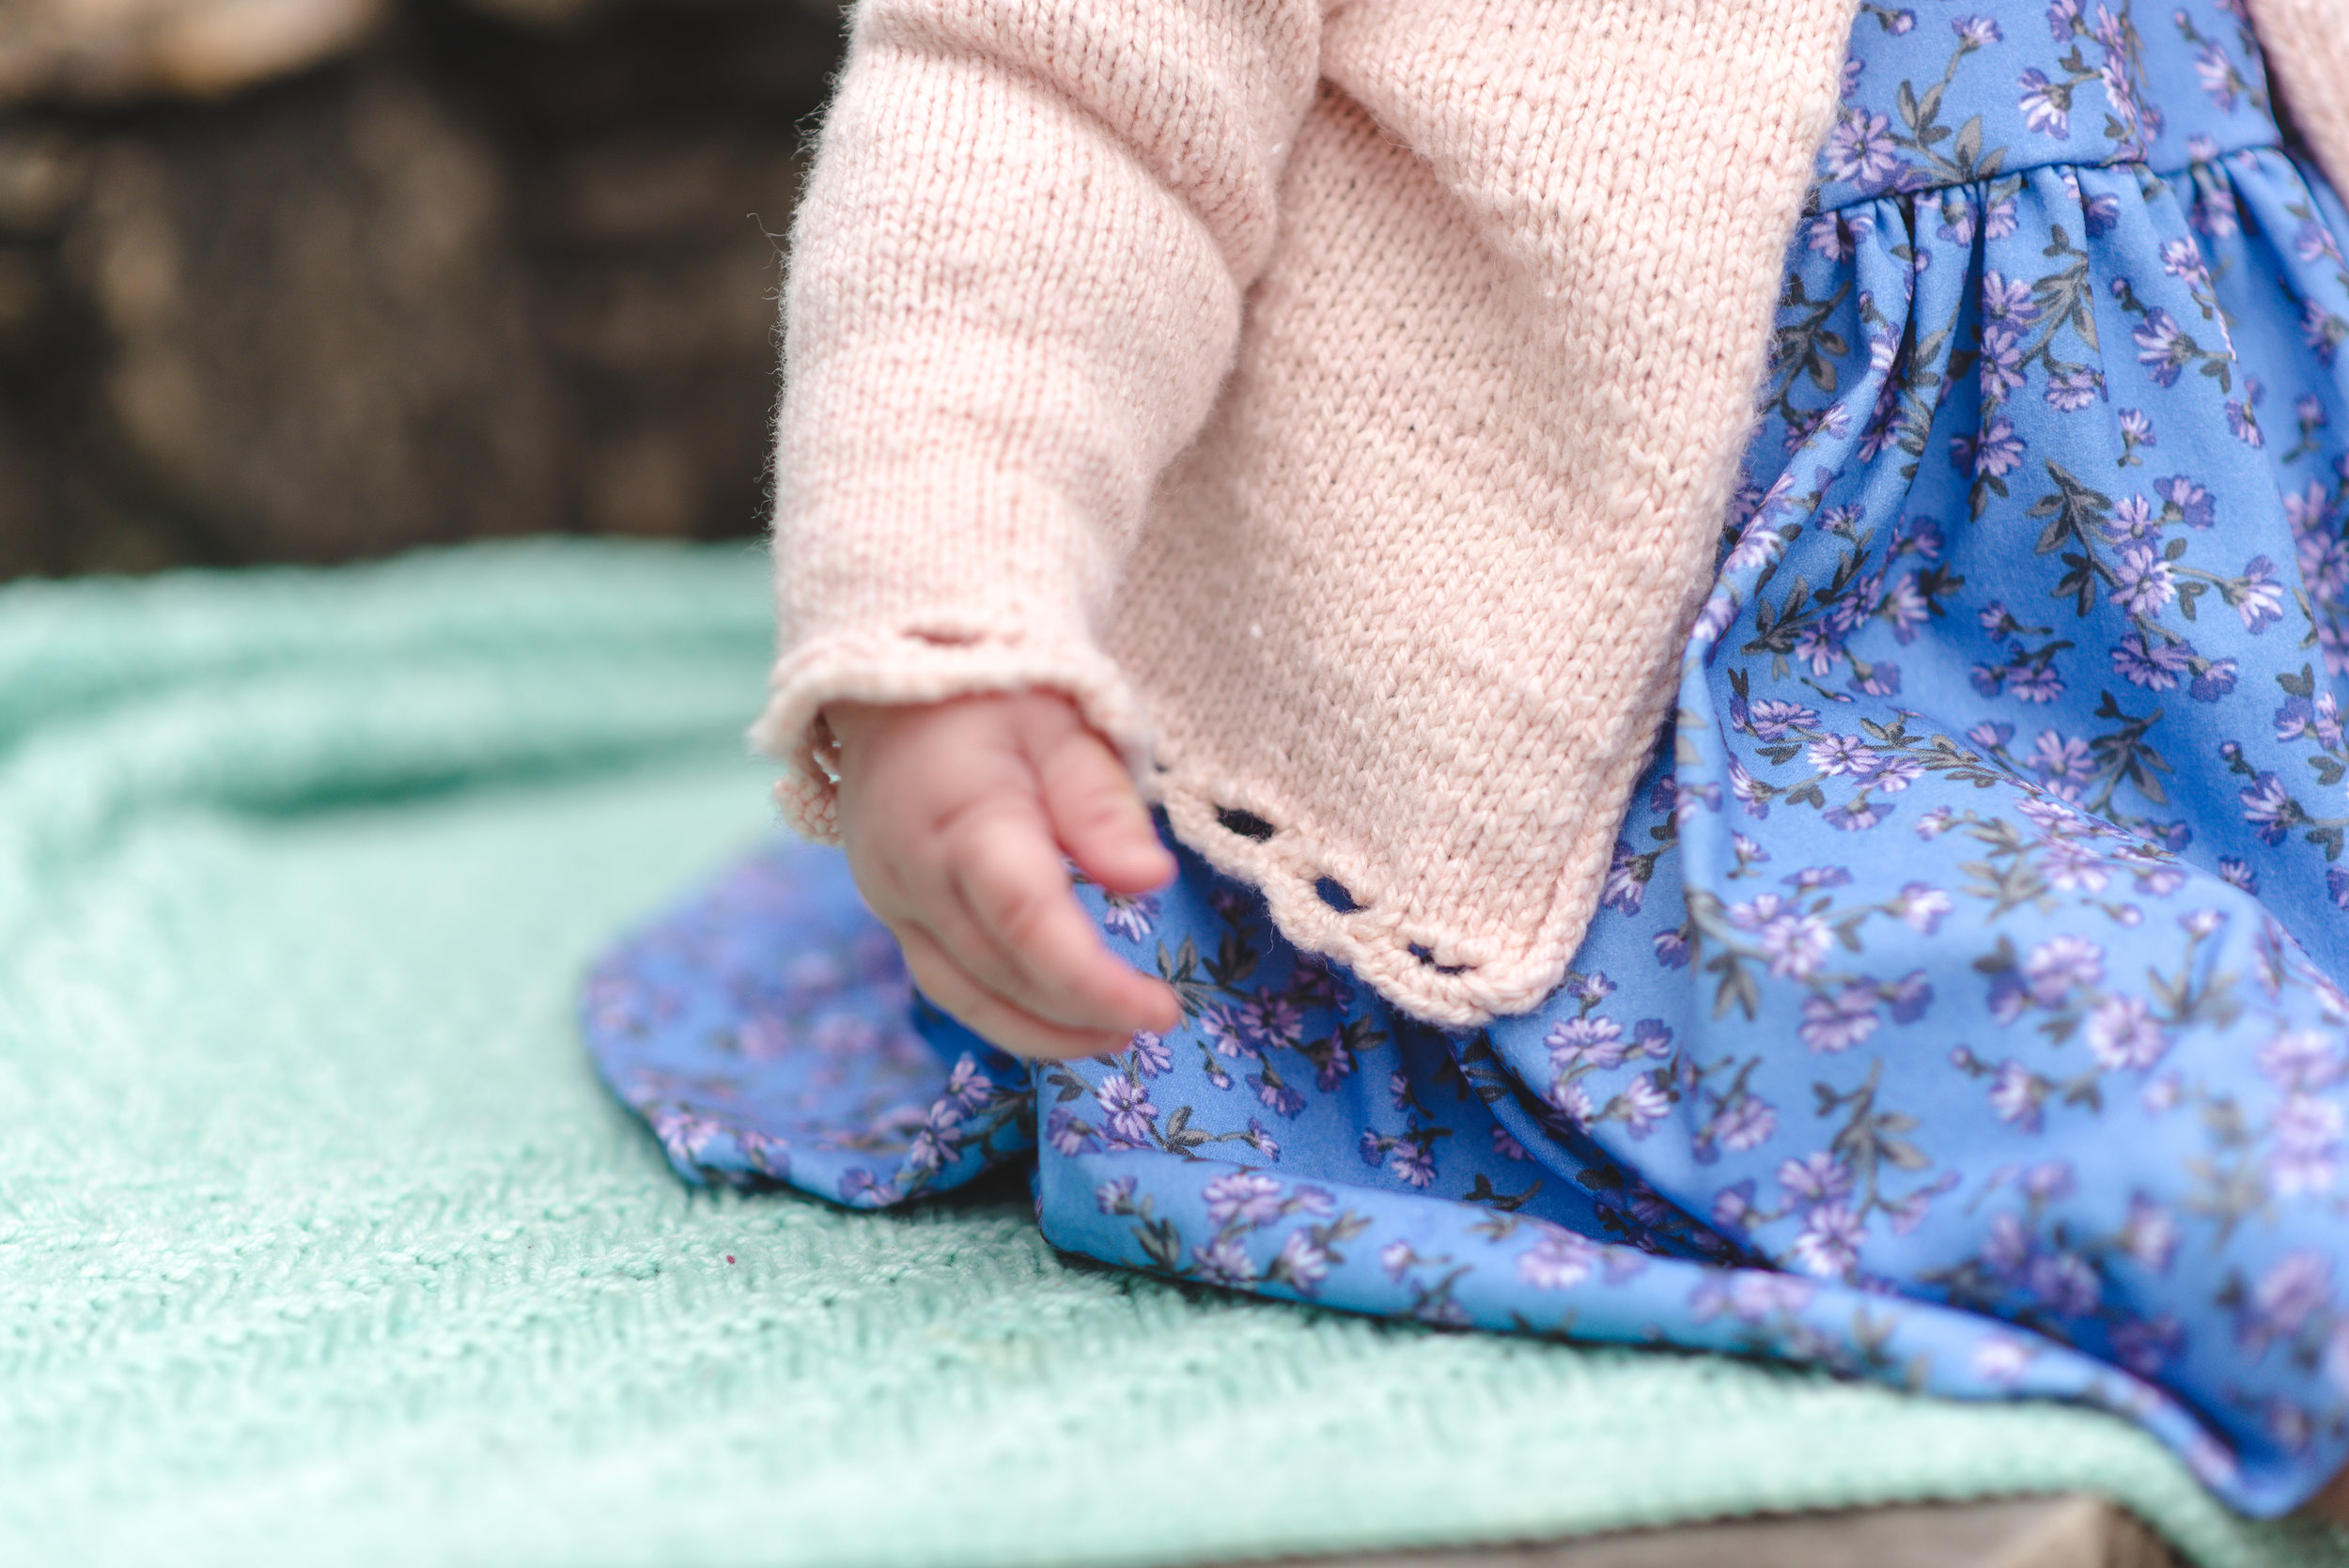
Keep Blushing
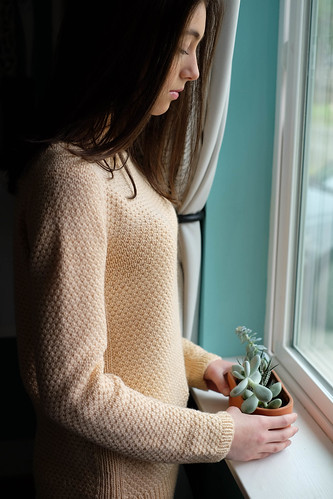
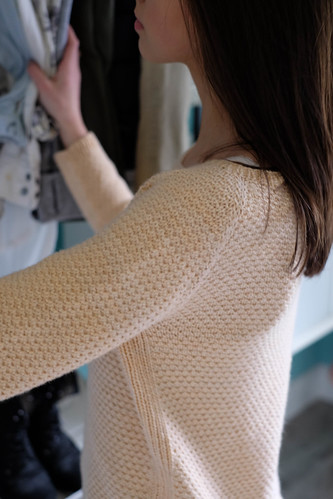
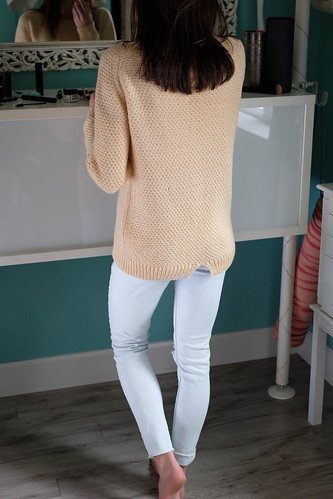
I can't actually believe it has been a year and a half since this pattern was originally published. There are some really lovely versions on Ravelry like this one by Norbertine or this one by anitasr. Seeing patterns knit up is one of my favorite parts of being a Designer. Blush is now available as a re-release now part of the Kate Oates line. This sweater features YOTH Yarns Big Sister in Peach. Photos posted here by Veronika Jobe with her lovely daughter Jasmine modeling.
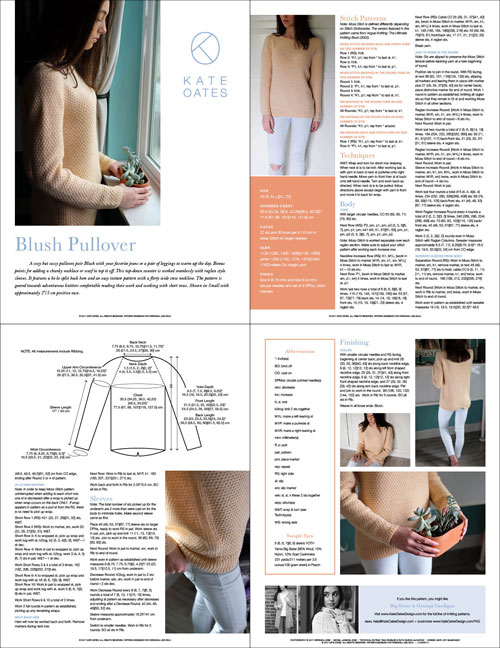
This sweater is a top-down seamless knit with raglan-style sleeves. There are a few short rows to add length to the back of the sweater and it is finished off with a cute little split at the back hem. The neckline is wide, in between a crew and a boatneck. The texture is cozy and soft and very pettable. A small width of ribbing on each side adds to the flattering fit.

With this re-release, I did not take new pictures but I did do some pattern tweaking in areas where I have received questions. There are some new tips to clarify the trickier bits. It is a pretty straightforward pattern but now is even more so.
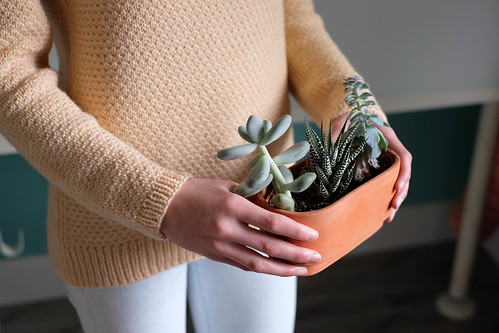
One thing that folks have asked about is the texture pattern which I have labeled as Moss Stitch. My version came from Vogue Knitting: The Ultimate Knitting Book (2012). It features texture and stockinette on alternating rows/rounds. If you have worked a Moss Stitch pattern in the past and the directions do not match up with mine, no worries! The stitch pattern name does not matter. If it makes you feel better, you can even cross out my "Moss" and come up with a new label. I can assure you that the stitch pattern instructions in Blush will provide you with the sweater you see in the pictures.
This particular stitch pattern also is one that blocks out beautifully. Since you will be knitting a swatch (right?), make sure you block the swatch so that you can see how nice it looks once it is dry. Swatching is even more important in textured patterns because many knitters will have a different tension when changing back and forth between knitting and purling on the same row, as opposed to stockinette where each row is either purled or knit.
I am enjoying getting reaquainted with these previously published designs and it really makes me happy getting to see them after their makeover. Here is a preview of my new format so you can see it too!
Enjoy 50% off this re-release today only with the code KATEOATES valid in the pop-up shop. When you shop on my site, you will automatically receive an e-mail with a download link to your pattern. If you create an account, you will also always be able to access the pattern going forward by viewing all of your orders. If you do not get your e-mail, you can check your spam filter for an e-mail from help@kateoatesdesign.com or just log into your account to see it.
I have another handful of re-releases to show off over the next few weeks but am also very much looking forward to a brand new design coming next month. Congratulations to Jessica for winning a copy of (re) Gramps last week, and to LISAKOBY for winning a copy of the updated Blush. Leave me a comment this week telling me what part of fall gets you most excited for a chance to win a copy of the next KO pattern!
ReGramps
When you get really excited about how pretty your new pattern format is... all of a sudden you have to vamp up your favorite older patterns so that they too can experience the new look. I have been spending loads of time doing this lately (and maybe not enough time knitting, oops). This is the first of several re-releases coming at you and joining the Kate Oates design line. Here is the new Gramps, one of my most popular designs ever.
This particular update has been planned for a little bit as I wanted to show off Gramps with an alternate look; a new sample and new pictures were required. The other minor tweaks that followed just happened naturally during the process and I think just make the design even better. I credit Veronika for almost all of these suggestions, you are a treasure Ve! She is also deserving of the yarn and photography credit AND she produced the gorgeous human who is modeling; you'll probably recognize Jasmine from other patterns (Blush, Big Sister) and of course lots of YOTH patterns as well.
You're looking at YOTH Yarns Daughter in a calming cream colorway called Natural Vanilla. This yarn has such great texture for cables. I'm working on something totally new with it as well and it has made me decide to cast on my VERY OWN GRAMPS as my Rhinebeck Sweater, after the new-new one is finished of course (no pressure). Did you know I hardly have any sweaters in my closet because they get knit up and then go on tour? It is sad! But this way you get to see them in your yarn shops and at shows, like Stitches Texas which is where ReGramps is headed in just a couple of weeks.
Notes on the updates: I adjusted the size labels because I think they were a bit confusing. They matched how my original model wore her sweater (which was pretty fitted) but it is more standard to include a few inches of positive ease for a sweater of this style. For example, the smallest size is now labeled as XXS instead of XS and so on. While the Finished Chest measurements are still your guide to what size you want to knit, I just wanted to mention this change to stem potential confusion. The other size adjustment was in the upper arm where I added just a tad more ease.
The only real design change is in the collar which is now a little bit more luscious and cozy because it is deeper and along with that, the buttonband is a bit wider. These tweaks make me happy all the way around and they will keep you warmer, too.
Lastly, I went ahead and adjusted the gauge on the pattern to reflect the new yarn choice in the featured pattern sample. It was very close to the original gauge but as you probaby know, even a slight gauge adjustment can change how a sweater fits and also how much yarn you need for your project! I don't want to be responsible for that!
I hope you fall in love with Gramps all over again just like I did. You can get this pattern for 50% off with the code KATEOATES for the first 24 hours through the Pop Up Shop. If you already have this pattern in your library either on my website or Ravelry you should already have access to the new version. I would love to hear your thoughts on the new look so leave me a comment! Also, comment to tell me which of my adult patterns you would most like to see updated and added to the line. One lucky commenter will win a copy of next week's pattern release.

Cheers,

Dyad
I have a new thing that I am so excited to share with you. I seem to be addicted to big projects, so this fall, I am introducing a new line of patterns which will simply be identified by my name. Without going on and on, I'll just say these adult patterns will be knittable, wearable, stylish and modern. I'll be publishing brand new designs (first one right now! finally!) and also refreshing & updating some of my favorite When I Grow Up designs with my new look and feel. I have to immediately and heartily thank Mary Joy Gumayagay who continues to wow me with her genius design skills and how she can understand what I want better than even I do. You are awesome. Love you! And now for the debut pattern: here is Dyad.
This sweater is perhaps a tad multiple personality. It's an honest design with complex character. When I conceptualized it, I thought about the many women that live in a daily roulette of roles. We work hard, we are professionals, we are providers, we are mothers, we are wives; the list goes on. I know my attitude varies based on surroundings and expectations alongside my own experiences and feelings. Dyad is a pliable cardigan ready to exemplify your spirit.
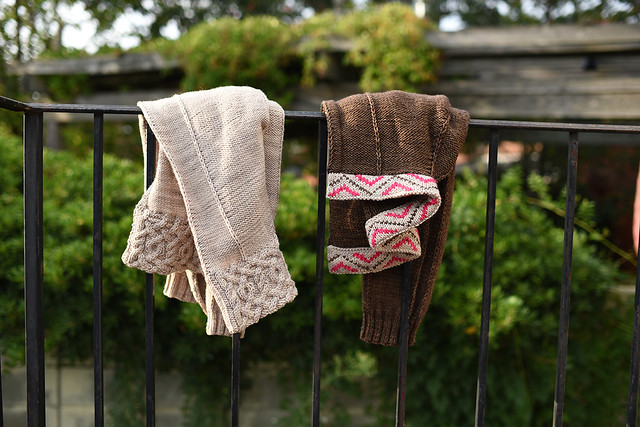
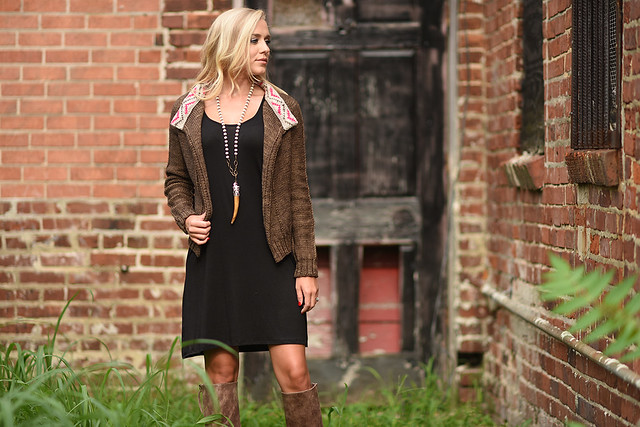
This top-down cardigan design is defined by duality: choose cozy cables or spunky colorwork, short or long, snug or generous fit. The faux seam lines are lengthening to flatter every body; knit it just as you want with the options you love.
The body of this sweater is worked seamlessly alongside the edging for a double breasted open finish. The collar is knit upward from provisionally cast-on neckline stitches and is doubled for reversible stability regardless of how the sweater lays. Finishing is minimal as there are no stitches to pick up for the edging.
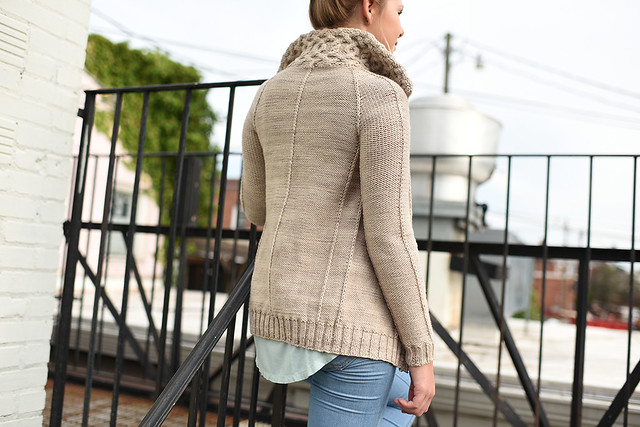
My knitting style gets a bit anxious: when I close in on a project, I am ready for my process to be over. Not every project can be designed with minimal finishing but if it can be done, I will do it and thus does Dyad. Edging is worked along with the body to nix that finishing step.
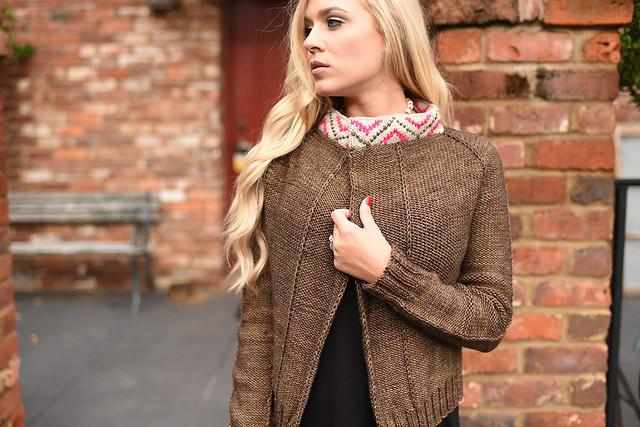
This pattern is designed for intermediate knitters comfortable with minimal seaming and working from a chart. Colorwork version shown in size S with 3”/15 cm positive ease; cabled version shown in size XS fitted with no ease.
I am thankful to work and live an in a supportive community and enjoyed partnerships every step of the way with this design. Magpie Fibers provided the yarn support for this project; working with Dami's colors and fiber made the knitting so enjoyable. And she didn't even blink when I asked about knitting a second sample to show off a very different option set. I want to also thank Krista Wilson for testing this pattern, knitting one of the samples and finishing way ahead of deadline. The yarn we used is called Domestic Worsted and you'll want to go shop for your own right here. Thanks also to my tech editing duo Tana & Edie for getting the pattern into top shape.
Poshture Boutique (Columbia, SC) was so generous in helping me style these pieces (along with another still to come). I shared my vision in how I would want to wear these sweaters and Kara's fabulous taste, along with my friend and photographer, Erica Billingsley, brought it to light. The two of them also hooked me up with models Kristin (wearing the colorwork version) and Delaney (wearing the cabled version). Check out Kristin's dress here, boots here, and stunning necklace here. Feeling a bit more casual? Delaney's top is here, boots are here & necklace here.
As for me, I want a funky colorwork collar when I am ready to make a splash but I will take my cables any day when I need to feel cozy and protected.
You can click here or on any of the photos to purchase the pattern. For the first 24 hours, you can purchase this pattern for 50% off with the code KATEOATES, valid through my shop only. Click on the blue "promo" link at checkout to enter the code. If you choose to create an account in the shop, you will have permanent access to your PDF purchases. Please join the new mailing list if you'd like to stay up to date on the new brand and be notified when the new website launches in full!
Whether you knit this sweater once or several times over, I hope it uplifts you freely and makes you feel amazing. I would love to hear your comments on this design and which version you think you'd like to make! Post a comment for me for a chance to win a free copy of the next KO pattern on the slate, which is Gramps revamped :)